create, kids

A Room Makeover for 10 year old boys

Lucky Boy! He’s next on the list for a room makeover, and has very strong ideas himself of how that might look!

Room Makeover for boys

He’s always had the biggest room – and it’s been the shared ‘playroom’ for the two boys, however, with more and more homework and less time to play with ALL of their toys, we thought it would be a good time for a bit of a de-clutter.room makeover age 10

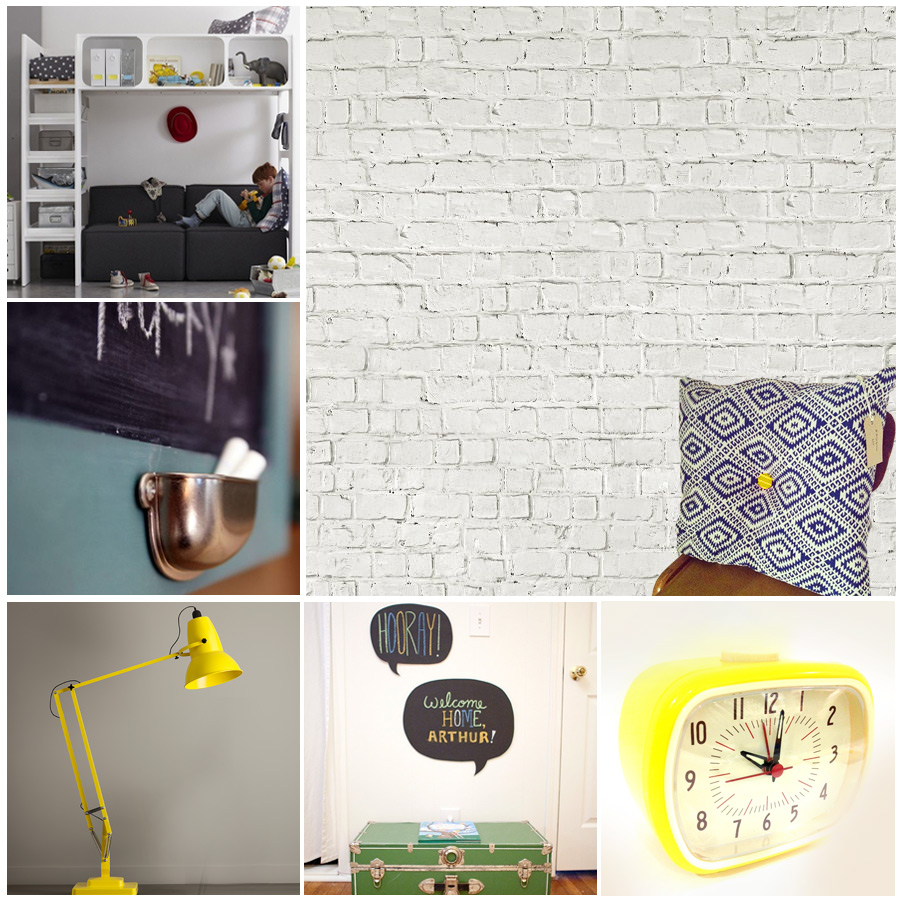
He has a great cabin bed already, so we’re going to give that a lick of paint, and although we have watched a great video on youtube, with a ‘space up’ bed which opens up to store your clothes and books – I’m not sure we’re quite ready for that yet!

So we’re planning a room makeover for boys refresh with some fab brick patterned wallpaper, love the look of this white loft brick wall mural on one wall, and a chalkboard on another – using blackboard paint, and some fun cupboard handles to hold the chalk!

He really rather likes yellow too, so we’re on the hunt for an anglepoise lamp – and an Alarm Clock is a must – He struggles with the mornings!

He also has a sofa bed in his room, which we’re going to keep there, it’s ideal when unexpected guests arrive, and he bunks in with his brother – so we’ll add a few scatter cushions from new Finnish designer Nora instagram.com/projektityyny to tie it all together – His brother has plans for his own room too so watch this space!

Ali also blogs over on aGreenerLifeforus.com and FunCraftsKids.com and is a new lover of Instagram too… pop over and say hello!


crafts, create, key stage 2, kids

Traditional Paper Star

The boys just love a paper craft, and we can thank our lovely friend Maggy for that (she told me to say that…) – Maggy taught them how to make origami paper boats when they were very little, and now at 10, the youngest is forever making Ninja Stars, Jumping Frogs and Paper cranes – and now his latest, the Traditional Paper Star.traditional paper star

For this lovely origami traditional Paper Star you need 14-15 square origami sheets, of various colours (we tried to persuade him to make them in Christmas colours, however, he is ‘his own man’ and went with these colours!) It literally only takes minutes to learn how to make this!

Fold each piece of paper to the long triangular shape, follow the youtube instructions linked here… demonstrated by the lovely Maggy from RedTedArt… and insert one into another until you join the first with the last to create this star shape – how lovely, we’ll be hanging this creation on the Christmas Tree next weekend!

Ali also blogs over on aGreenerLifeforus.com and is a new lover of Instagram too… pop over and say hello!


crafts, create, education, key stage 2, kids

Papier Mache Disaster Meteorite

So, we decided to make some Papier-mâché hot air balloons… that’s how it started out, all good intentions.

So 7yo being the possibly more crafty of the two (yep, the 5yo is crafty in other ways, say no more) got stuck right in….

KidsChaos PaperMache age 7 bowl
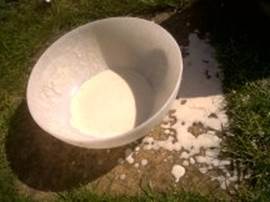
1) We made the glue: mixed one cup of flour, and two cups of water, and a teaspoon of cinammon (that way it smells nice too)

KidsChaos PaperMache newspaper age 72) We ripped the newspaper into strips

3) 7yo took off his brand new hoodie as he didn’t want to get it mucky

KidsChaos PaperMache planet age 7KidsChaos PaperMache disaster age 74) We pulled each strip through the ‘glue’ and let it drip back into the bowl (AND all over the garden too, much to SAHD’s delight)
5) We layered and layered until the balloon (Oh, I didn’t mention that bit did I? – blow up a balloon, and balance it on a bowl to stop it blowing or rolling away) was covered in paper mache.

Then we had to leave it to dry for a day (which is where 5yo lost interest, so I’d say stick with one layer if you’re not bothered about keeping the masterpiece for ever!)

KidsChaos PaperMache disaster meteorite age 7
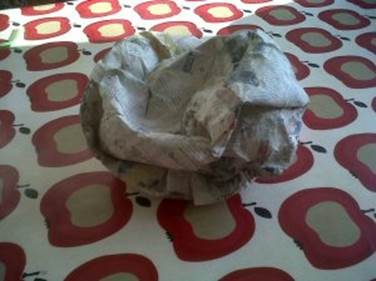
We learnt an important lesson here, on Day 2 when we went back to add another layer, 7yo’s balloon had shrivelled, but we layered on some more paper mache…. MISTAKE, with no balloon inside to hold it’s shape this happened…

Not to be out-witted by the wilted balloon, 7yo spun it round (phew, was waiting for a tantrum) and said he would make it into a meteorite – which is what he did! Job done…

Thanks to Maggy at RedTedArt for continuing to encourage us to ‘get crafty!’

For a more successful foray into papermache check out our post here on Paper mache seed pots – using the blender! and using pulp from cereal boxes … this time it worked!paper mache seedling pots

Follow Ali on twitter as @incredibusymum and twitter.com/MoreKidsChaos for more posts like this one… Erm, and funnily enough on Google+Facebook and Pinterest! Pop over to say hello x Like it? Pin it! and come say hello at instagram.com/incredibusy too x
Ali also writes over on AGreenerLifeforus.com
cooking, cooking with kids, food, kids

Quick Pizza with White Beans, Garlic and Rosemary

Pizza stage 1 Bean-Garlic-Rosemary-KidsWe do like a quick pizza on a Friday, or a playdate night at our house!

When we make our pizza base mixture in the bread maker, we always make double quantity and freeze them in small balled portions…

Perfect – so this morning, I took four of these portions out of the freezer, popped some flour onto a plate and place each of the frozen balls onto the plate to defrost for the afternoon.

Both boys like a different pizza topping, this is 11yo’s as he’s not so keen on cheese and tomato (what?!) – you’ll see he’s moved the mozzarella into one slice size just for me!pizza with bean garlic rosemary

Ingredients (for two)

2 pizza bases (either buy them ready made, use flatbreads, or follow the instructions for the pizza setting on your breadmaker)
Slosh of olive oil
2 large garlic cloves
400ml water
2 tins of beans – we used chick peas, although very nice with cannellini beans
Couple of sprigs of rosemary
1 ball of mozzarella
Handful of olives and capers
Salt and pepper

Directions for this quick pizza

Heat oven to 240ºC.
Chop the garlic, and fry gently for about a minute in the olive oil, adding the white beans, and the water, turning up the heat and simmering. Pour the beans, garlic and water into a small blender and whizz up, leaving some beans (or chick peas in this case) partially whole. Add a little water, and stir, seasoning this puree with salt and pepper and spread.

Spread the puree over both pizza bases, chop up the olives in half, and sprinkle them with the capers over the pizzas (not too many, as they are both super salty).

Rip up the mozzarella and drop onto the pizza bases (not essential, tastes good without if you’re not fond of cheese!)

Drizzle over the olive oil, and scatter the torn rosemary and pop in the hot oven for 10 minutes. Enjoy your ‘quick pizza’… 🙂

Follow Ali on twitter as @incredibusymum and twitter.com/MoreKidsChaos for more posts like this one… Erm, and funnily enough on Google+Facebook and Pinterest! Pop over to say hello x Like it? Pin it! and come say hello at instagram.com/incredibusy too x
Ali also writes over on AGreenerLifeforus.com


crafts, create, gardening, kids

A quick blog post to share with you the wonder that is camping… and the sort of crafts you can do whilst you are stuck in a Pine Forest in #FrenchFrance and the boy’s pineapple pinecone.

Pinecone Pineapple
We go on holiday every year with some lovely family friends, and as the kids get older, they get more and more feral, and tend to take themselves off in packs, doing their own thing, whether it comes to popping to the camp playground to make new friends, or getting crafty with the paints and pencils we still take with us every year… So it was with much delight that I found this Pine Cone Pineapple creation by our eldest, he liked it so much he posted it onto his new ‘now I am going into Year 7 please may I have an Instagram account?’ instagram feed….

Pine forest

It was a very visually inspiring place it has to be said… with the largest sand dunes in the World on our doorstep in a pine forest at the foot of the Dune de Pyla. You just had to look UP and the view was pretty awesome too… Look at those leaves!

Follow Ali on twitter as @incredibusymum and twitter.com/MoreKidsChaos for more posts like this one… Erm, and funnily enough on Google+Facebook and Pinterest! Pop over to say hello x Like it? Pin it! and come say hello at instagram.com/incredibusy too x
Ali also writes over on AGreenerLifeforus.com
crafts, create, google+ hangouts, kids, Uncategorized

W is for Whale – paper cup craft

Paper cups are a great asset to a store cupboard… you never know when the post school playdates may descend on you, and for this time of year, paper plates and cups are often safer in the garden for the al fresco dining that may take place!W is for Whale paper cup craft

They are also VERY handy for a last minute craft session, particularly if you are practicing your alphabet crafts – and all you need for this W is for Whale paper cup craft, is two paper cups, some parcel tape and a couple of googly eyes!

You will need:

Two paper cups
Parcel Tape
Googly eyes
Pipe cleaner (white or blue)
Hama or Perler Beads in an array of blues and white!

Instructions:

1) Using the parcel tape, stick the two cups together facing each other to create the body shape of the whale.

2) Wrap the parcel tape all over the body of the whale to cover it.

3) Fashion the whale’s tail from more parcel tape and attach to one end of the paper cup whale.

4) Do the same with the two front flippers, and attach just below the position on the eyes.

5) Add the googly eyes, essential in any paper cup craft!.

6) Pierce a small slit where the blow hole on the top of the whale’s body will be.

7) Push the pipe cleaners, or wires, into the hole, and add some Hama or Perler beads to look like water drops and you are DONE!

For more quick and simple paper cup ideas, check out our Paper Cup Frozen Crown and Red Ted Art’s pom pom party poppers!

Follow Ali on twitter as @incredibusymum and twitter.com/MoreKidsChaos for more posts like this one… Erm, and funnily enough on Google+Facebook and Pinterest! Pop over to say hello x Like it? Pin it! and come say hello at instagram.com/incredibusy too x
Ali also writes over on AGreenerLifeforus.com
charity, kids, life, theatre reviews

Moomins Review 2014 – Polka Theatre

We do love Wimbledon’s Polka Theatre, and as the boys get bigger, I fear I may be toddling up there on my own to watch shows without them! We took them to see The Moomins ‘Moominssummer Madness’ at the weekend, and we are all in agreement that it was a most delightful show. We were enchanted by the characterisation of Snorkmaiden and Moomintroll, of Moomimmamma, Snufkin and Little My (the youngest boys’ favourite character by far – see handwritten review below!) of course, Misabelle was absolutely fabulous too. KidsChaos-Polka-Theatre-Moomins-Puppets

The show is based on Tove Jansson’s 1964 book Moominsummer Madness and as the boys and their Dad have read MOST of Tove Jansson’s Moomins Books they were chuckling along and all said that it was a great adaption.

Moomins Review

KidsChaos-Polka-Theatre-Moomins-Snorkmaiden-and-Moomintroll

Moomins Review

Tove Jansson’s much-loved Moomins are brought to life on stage with the ensemble’s fabulous puppetry, songs and and great humour. Moominsummer Madness is part of Tove100, celebrating the 100th anniversary of the birth of Tove Jansson.

To book at the Polka Theatre, SW19 click here.
Follow them on twitter here @polkatheatre.

Follow Ali on twitter as @incredibusymum and twitter.com/MoreKidsChaos for more posts like this one… Erm, and funnily enough on Google+Facebook and Pinterest! Pop over to say hello x Like it? Pin it! and come say hello at instagram.com/incredibusy too x
Ali also writes over on AGreenerLifeforus.com


charity, education, kids, life

see the childSee the Child: Change the System

I was lucky enough to be at Britmums Live 2014 and attended one of the INSPIRE sessions, “How to be an Agent of Change: Advocacy and charity campaigns” featuring Camila Batmanghelidjh, Kids Company; Lindsay Atkin, Lilies Are Like YouTuber; Hayley Goleniowska, Downs Side Up; and Chris Mosler, Thinly Spread.
Camila Batmanghelidjh
All very inspiring women indeed – and Camila Batmanghelidjh is the founder of Kids Company – the charity behind See the Child. Change the System.
Camila spoke of how vulnerable children in Britain desperately need our help. She movingly talked of how too many children across the country are suffering squalor, abuse and neglect. Most can’t get any help because the system just isn’t coping. Watch this video:WHAT CAN YOU DO TO HELP? Please help by signing the petition to show you care. This will help support an independent task force to redesign children’s services so that every child who needs help can get it. By voting, you too are helping to show the politicians that we’re no longer going to stand for this. Many of these children, and those who work with them, are being failed by a system in crisis, vote now by clicking here.
Visit the campaign’s website seethechild.org for more information.
Please do follow on Twitter @SeetheChild along with Facebook, G+, and instagram and search for the hashtag #SeetheChild and start sharing by commenting, and retweeting.
#SeetheChild are asking people to text I SEE to 63000 – (a standard network charge as a vote, not a donation). The text will constitute a ‘vote’ for change but you will also be able to sign up on the website.
see the child Ali CliffordFinally, in addition to voting, #SeetheChild would really like you, your friends, followers and family to post a picture of yourself as a child with the campaign messaging something along the lines of something like: “This is me as a child. Some children don’t have such happy childhoods. I’m supporting the #seethechild campaign to change Children’s Services in the UK. Share your childhood photo and sign the petition here bit.ly/1tfykF3.
Follow Ali on twitter as @incredibusymum and twitter.com/MoreKidsChaos for more posts like this one… Erm, and funnily enough on Google+Facebook and Pinterest! Pop over to say hello x Like it? Pin it! and come say hello at instagram.com/incredibusy too x
Ali also writes over on AGreenerLifeforus.com
father's day, kids, life

Robotic Anki Drive race cars powered by artificial intelligence (AI)

My new favourite Futuristic Toy! Launching this Wednesday at Apple Stores in the UK, the Anki Drive racing game was created in 2010 by Carnegie Mellon Robotics Institute graduates and robotics experts using the same criterion as Google’s self-driving cars.Anki Drive robotic race cars

The cars and the race mat (and the packaging for that matter) are beautifully designed. Pictured here is the yellow ‘KOURAI’ who has his own personality type, and as one of my friends pointed out on Instagram tonight, has a look of the Batmobile about him… Probably due to Boris Sofman, Anki’s CEO’s astute involvement of none other than Batmobile and Iron Man‘s facemask designer, Harald Belker.

So, grab your iPhone, iPad or iPad mini and pick a car! The player can race others cars that control themselves (AI) which spookily respond and adapt to the real player. As you get started racing (either solo with the AI or with friends) the cars’ technology realises where they are on the mat, and navigate the course (without falling off the track, which I do recall with some painful memories of the scalextric slot cars we had constantly falling off the track).

My boys love playing Mario Kart on the Wii… so I can’t wait to get racing with the Anki Drive with them – driving these funky miniature, AI robotic cars with bonkers personalities and upgradable armoury! (and even better, when you’re finished playing, you just roll the racing mat up and store it in its box!)

So watch this space for a review from the boys… I’ve had a great morning playing with these Anki Drive race cars, and I know what Mr. KidsChaos is getting for Father’s Day!

Follow Ali on twitter as @incredibusymum and twitter.com/MoreKidsChaos for more posts like this one… Erm, and funnily enough on Google+Facebook and Pinterest! Pop over to say hello x Like it? Pin it!

competitions, crafts, kids

Every month we run a craft challenge on a theme – June is #ZooCrafts in honour of the first #WorldGiraffeDay on June 21st. getyourcrafton

Share your Zoo Crafts photos on Instagram, or over on Twitter, using the hashtag #GetYourCraftOn, add your link to the linky below, and we’ll pick the best ones to feature here on the host blog the following month. (and on our Pinterest board too)

The photos you share do not have to be of the finished article – let’s see your work in progress as well as your completed masterpieces! Anything related to the #ZooCrafts or #GiraffeCrafts topic. Just tag them with #GetYourCraftOn and follow and tag us too if you’d like to! Our team’s five Instagram accounts are: @incredibusy (that’s me!), @redtedart @domesticgoddesq @bluebearwood &@missielizzie.

WIN-for-getyourcrafton-Hugger-Childs-BackpackWIN-for-getyourcrafton-Sophielagirafe-skincareEnter your blog post or Instagram link below for a chance to WIN prizes from UK retailer 1twokids who are giving away a Hugger Child’s backpack and from Sophie la Girafe cosmetics, some organic skincare! Make sure you are following them on Instagram too…instagram.com/slg_cosmetics

Top 35 Zoo CraftsThis month’s winners are no.18 House of Alphonse for the The Papercut Llamas, and no.20 Niki at www.playlearneveryday.com for her Cute Clay Giraffes – well done you two and thank you to EVERYONE who took part…

To join in the next #getyourcrafton click here for ‘stationery’ over on Red Ted Art – have fun!

[inlinkz_linkup id=411447 mode=1]

So what’s #GetYourCraftOn?

It’s a monthly craft challenge organised by five bloggers – zingzingtree, Red Ted ArtMe And My ShadowKids Chaos and Domestic Goddesque.

World Giraffe Day celebrates the conservation and awareness of all nine subspecies of giraffe on 21 June 2014. Ali also blogs over on aGreenerLifeforus.com and is a new lover of Instagram too… pop over and say hello!