Chaos writes:
 So – the challenge to MAKE something with spare jigsaw puzzle pieces… And I think we’ve cracked it with these greetings cards. The shape of the puzzle piece with the ‘sticky out bits’ inspired us to think of Frankenstein’s monster, with the bolts in his neck, so we drew his body attached his head, with some googly eyes and requisite ‘scars’ and away you go! Ideal for a Father’s Day card, or a MONSTER Birthday card .
 A second idea is a nod to the two parts of the puzzle making ONE, so it’s great for an anniversary, or wedding card. And equally adding a third piece for a new baby card!
And I’ve created FREE printables here for you:
FATHER’S DAY CARD
MONSTER BIRTHDAY CARD
ANNIVERSARY CARD
WEDDING CARD
 VALENTINE’S DAY CARD

 A few crafty types came together on Google+ to discuss our jigsaw puzzle craft idea – watch it here. You’ll also be able to see our host Maggy Woodley’s Coasters, Fridge magnets, trees, snowflakes and trees; Crystal’s Brooches, Kelly’s bird puppets, Lizzie’s Family photo keyrings, Anthea’s puzzle resin crafts. If you’d like to see MORE ideas for Father’s Day click here. And more MONSTER crafts here.
Are you on Google+ Follow me here, and say hello, and I’ll add you back to my circles.
Oh, and I’m on twitter.com/MoreKidsChaos too… Erm, and funnily enough on Facebook and Pinterest! Pop over to say hello x Like it? Pin it!
Pine Cone Crafts – Hedgehog
Chaos writes:
Looking for something different to make with the air-drying clay we bought AGES ago from my namesake the poet Graham Clifford at Canonbury Arts, when I was working in Islington. And at the same time, pondering, what do we do with the pile of pine cones we have beside the fireplace? So we figured, this adorable hedgehog!
So easy to make this little fella, one large ball of clay, formed into an upturned face, four smaller balls, flattened for feet, claws indented with the ends of a pair of scissors, two petal shaped ears, and a little bobbly nose… I find that having a little cup of water to soften the clay whilst you are working, really helps… we used felt-tipped pens for the colour detail when the clay had dried. The feet, I’ll admit, keep falling off, so we glue-gunned them on.
We are going to try some more over the Easter break with some Fimo instead of the clay, as it’s it’s more malleable for the kids, will let you know how we get on!
 THEN Maggy at Red Ted Art invited a few of us creative types to ‘hang out’ on Google+ to share our pine cone expertise…! I must admit we did have a FEW technical problems, from falling cameras to lost internet connections! You can see the edited version here, and yes, I do pop up at both ends of the video with my superman cape flapping behind me….please do take a look at the following links from the other creatives for shed loads of pine cone inspiration. Lizzie at Me and my Shadow produced a most fabulous photo holder, which is what we are going to make with the ‘spare’ pine cones we have. Aly at Plus 2 point 4 had some printing with pine cones. Anthea at Zing Zing Tree made a very adaptable felt animal creation.
The Frog & The Fairy made some adorable small world play trees. Jen Mum at the Madhouse made a gorgeous owl. Kelly (and her small person) Domestic Goddesque shows us how to make a beautiful door hanging, and of course, our lovely host, author Red Ted Art shares some pine cone babies from her book.
Oh, Maggy’s book is launched 28 March 13, so don’t forget to order your copy now!
Are you on Google+ Follow me here, and say hello, and I’ll add you back to my circles.
Oh, and I’m on twitter.com/MoreKidsChaos too… Erm, and funnily enough on Facebook and Pinterest! Pop over to say hello x
Egg Dude – quick Easter craft
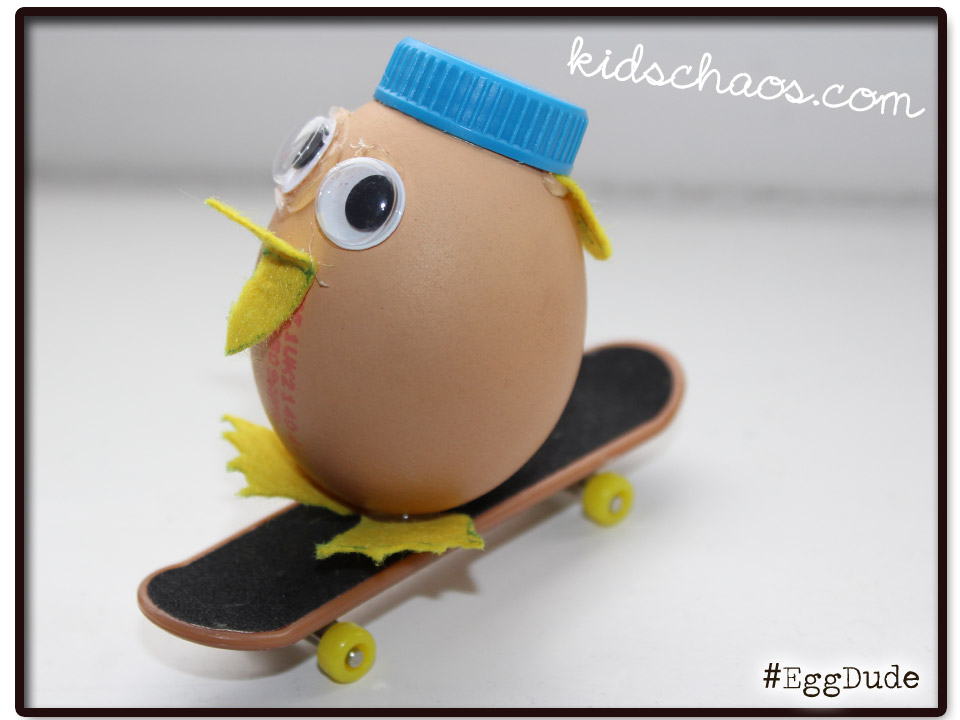 Chaos writes: Eek, last minute request from small child, “Mummy – quick, I need to make an Egg character for school” – so, all his own thoughts, and creation, including the bottle-lid cap on backwards, and the techdeck skateboard! He’s even pretty handy with the glue gun too – and ran around to our lovely neighbour to borrow a Turkey Baster (video with said neighbour demonstrating!) to blow his egg in style!
Obviously, you could paint or decoupage your egg, however, he was “in a rush Mummy” – love him.
click here to see other bottle lid crafts.
Are you on Google+ Follow me here, and say hello, and I’ll add you back to my circles.
Oh, and I’m on twitter.com/MoreKidsChaos too… Erm, and funnily enough on Facebook and Pinterest! Pop over to say hello x
Cooking with Kids: Squid rings, garlic, rocket and pasta for supper!
Chaos writes:
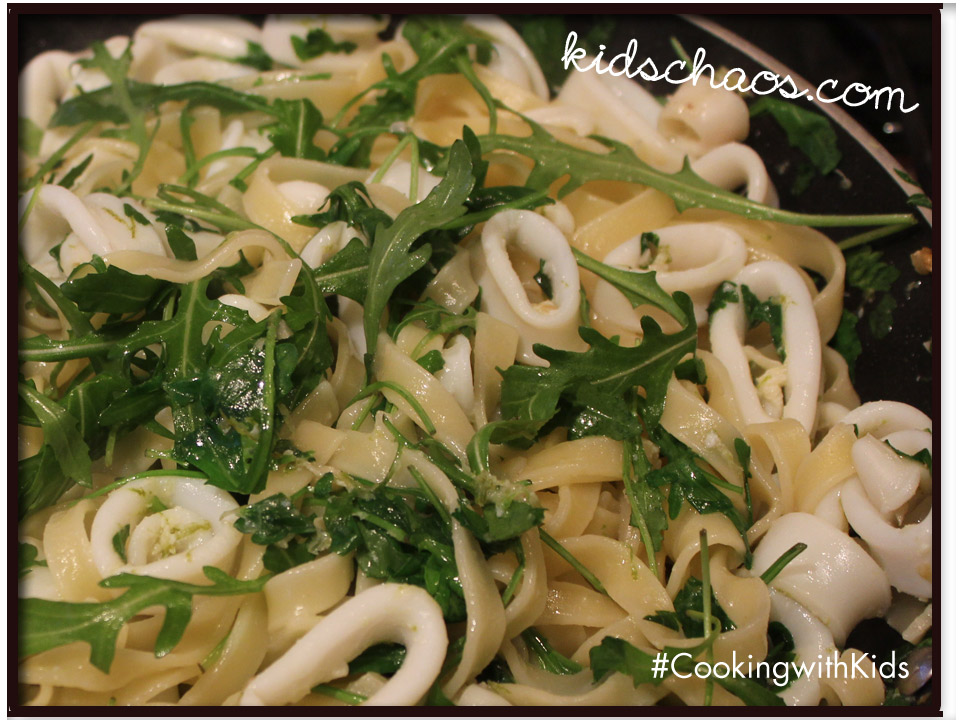
We have a lovely recipe for Squid with Fennel…. 10yo LOVES it and requests it ALL the time. Trouble is, last time we made it together, 8yo cried the whole way through the meal… So, 10yo and I have come up with a compromise, and have replaced the fresh fennel, and fennel seeds with rocket. So cooking with kids has a new recipe for you….And 8yo was so delighted by this option, he offered to make it all himself!…. Using his beloved Sheeplands Farm Bamboo chopping board (his favourite Christmas pressie can you believe?) check out this speedy easy recipe:
INGREDIENTS: (serves 4)
400g dried tagliatelle
600g frozen squid rings (calamari)
couple of handfuls of rocket leaves
1 lime
3 cloves garlic (finely chopped)
2 tablespoons fresh parsley (finely chopped)
olive oil
sea salt
ground pepper
Heat the olive oil, and gently fry the garlic. Meanwhile, pop the pasta on to cook in a large pan of water. Add the squid rings to the fried garlic (make sure they are defrosted) and the zest of the lime, and half of the lime juice, and the chopped parsley. Drain, and add the cooked tagliatelle pasta, and the rocket too, and give it a good stir.
Season to taste, adding a little more of the lime juice if needed.
We like to grate some parmesan over it to serve (although, according to the OH, this is ‘against the law’ of no cheese with seafood… don’t ask) which is delicious!
Want a speedy pancake pud to follow? Click here for the quickest pancakes in the history of the universe.
This one’s great for the school dinner packed lunch flasks for the next day if there are any leftovers!
For more Cooking with Kids recipes, join my community over on Google+ here.
Oh, and I’m on twitter.com/MoreKidsChaos too… Erm, and funnily enough onGoogle+, Facebook and Pinterest! Pop over to say hello x Like it? Pin it!
Ali also writes over on AGreenerLifeforus.com

Bottle Lid Monster
Chaos writes:
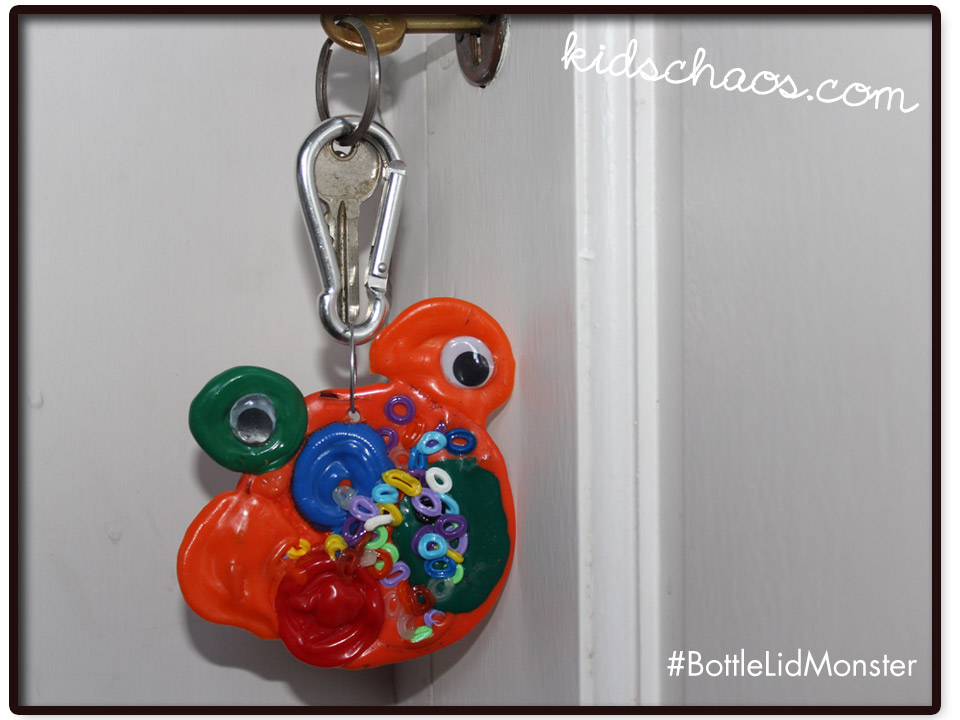
8yo wanted to personalise his book bag so that he can spot it, at a glance, amongst all of the identical school book bags, piled high on the playground floor. So we made the most of the oven being warm from a baked potato supper, and positioned some plastic bottle lids on some foil on a baking tray.
Five minutes later, and as the ‘monster’ started to melt, we added some Hama (or Perler) Beads for a bit of colour, and they melted in beautifully. Bringing it out of the oven to cool (warning, it does get super-hot) we positioned the googly eyes (don’t do that too quickly as the eyes will start to melt too!) I pierced a hole with some scissors, and we added a key ring and out Bottle Lid Monster is complete and ready to adorn said book bag with pride!
 We also thoroughly enjoyed a Google + hangout with this one too, featuring Maggy’s redtedart‘s bottle lid stamps, and ladybugs. Adele from Playful Learners bottle top Easter art, Anthea at Zingzingtree‘s bottle top flowers and people. Also Cerys’s beautiful bottle top owl, and a first – our anonymous blogger with Spanish Marbles, plus Kath’s KnittyMummy’s beer bottle photo badges.
For more Monster ideas, click here and for other bottle lid ideas click here. And for a fab Despicable Me Perler Bead classic click here.
Oh, and I’m on twitter.com/MoreKidsChaos too… Erm, and funnily enough on Google+, Facebook and Pinterest! Pop over to say hello x Like it? Pin it!
Ali also writes over on AGreenerLifeforus.com
Children’s Art School
 Chaos writes:
We belatedly wanted to tell you about the fabulous new Children’s Art School which opened just in time for Half Term. 8yo went along for the two day course, and absolutely LOVED it! (aimed at 7-12 year olds, this was just perfect for him)
The theme was ‘Objects in Motion’ – They played drawing games, looking at how colour can create and show motion, they made mobiles, and over the second day worked on them further.
 As the youngest of two very creative children, it was nice for him to be the focus of the artistic attention, and he is so incredibly proud of the work he produced.
The venue by all accounts, inspired the children beyond the realms of their usual classrooms, and Katriona, the course leader was both encouraging and fun to work with.
There are more of these holiday courses planned for the Christmas break… perfect!
To find out more, visit www.childrensartschool.org
And follow them on twitter too @ChildrensArtSch
Flutter those lashes
 Half term fun with Fimo – how simple is this! On the way back from the Canal Museum this week, we called into my all time fave shop (well, I was an art student, what do you expect….) And 9yo picked himself a couple of pressies (for being good all week….) – Three packets of Fimo, and some googly eyes!
The chap in the London Graphic Centre at Charing Cross was such a sweetheart too, he kindly offered to bubble-wrap 9yo’s plaster cast of the canal bridge plaque he’d made at the Canal Museum. #hero
We positioned the eyes, took a photo, removed the eyes, baked the characters in the oven, and with our trusty glue gun, stuck them back on, using our photo for position-reference! – Job done!
Papier-mâché hot air balloons
Chaos writes:
So, a couple of years back, we decided to make some Papier–mâché hot air balloons… that’s how it started out, all good intentions. And I wrote about it then over on TheGoodlifebloggers.com.

So 7yo being the possibly more crafty of the two (yep, the 5yo is crafty in other ways, say no more) got stuck right in….
 1) We made the glue: mixed one cup of flour, and two cups of water, and a teaspoon of cinnamon (that way it smells nice too) 2) We ripped the newspaper into strips

2) We pulled each strip through the ‘glue’ and let it drip back into the bowl (AND all over the garden too, much to SAHD’s delight)
 3) We layered and layered until the balloon (OH, I didn’t mention that bit did I? – blow up a balloon, and balance it on a bowl to stop it blowing or rolling away) was covered in paper mache.
Then we had to leave it to dry for a day (which is where 5yo lost interest, so I’d say stick with one layer if you’re not bothered about keeping the masterpiece for ever!) We learnt an important lesson here, on Day 2 when we went back to add another layer, 7yo’s balloon had shrivelled, but we layered on some more paper mache….
MISTAKE, with no balloon inside to hold it’s shape this happened… It collapsed.
 Not to be out-witted by the wilted balloon, 7yo spun it round (phew, was waiting for a tantrum) and said he would make it into a meteorite – which is what he did! Job done….
Thanks to Maggy at RedTedArt for continuing to encourage us to ‘get crafty!’

- 7yo with his ‘meteorite punch-bag’ hanging on the washing line
Halloween Cake inspiration
Chaos writes:
So, I normally leave any unnecessary “decorated” cake making to neighbours (!) – saving my skills for special occasions such as Birthdays, and um, Birthdays.
So, chancing upon some amazingly simple cupcakes today, in our local cafe – the Gooseberry Bush , I thought I’d share these with those of you who can’t make it to Wimbledon in the next few days!
Be inspired, be VERY inspired! x