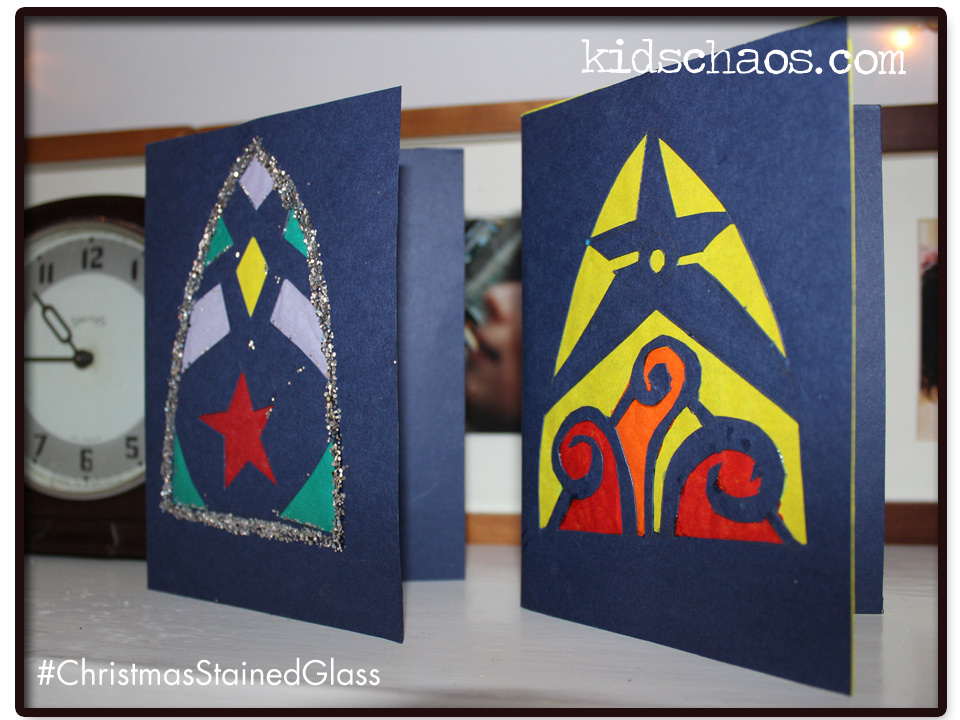
There’s still time to make your CHRISTMAS cards, let’s get creative!
So we’ve gone all churchy and made these lovely stained glass window style cards…. cutting shapes from the card, and gluing coloured tissue paper behind the apertures.
Eek… I let the boys use a scalpel!
These look fab with a tea-light popped inside (battery operated for safety) or stuck to a window.
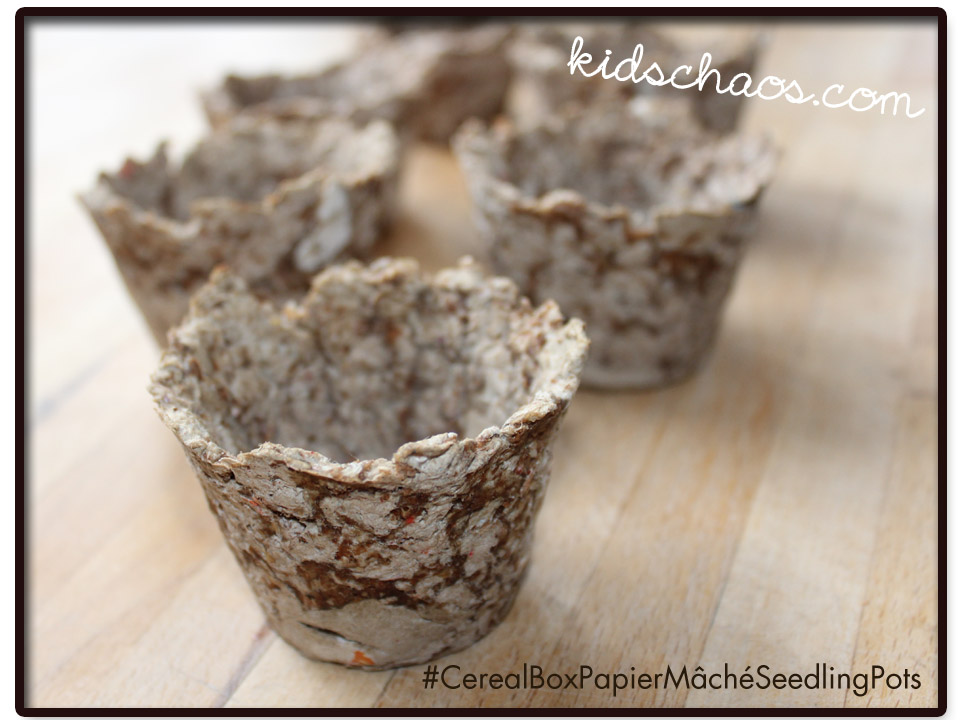
So… what does one do with cereal boxes, if you can’t bear to stick them in the recycling, how about cooking up some cute little Papier–mâché seedling pots.
We ripped the cardboard cereal boxes and rice cake boxes into small pieces, and gave them a good soaking. Then pulped the pieces with water, in the blender (sssh, don’t tell Daddy).
Draining the pulp in a colander, squeezing the excess water. Flour the work surface, and mix, knead in some flour {SECRET INGREDIENT ALERT!}. And take small quantities, pushing into the silicone muffin cases to mold the little pots. We air-dried the pots over-night, however, for speed, you could pop them into the oven, if you were baking spuds, or home-made pizza anyway!
We DID try to make a batch of these seedling pots in conventional metal cake trays… FAIL!, they set solid, glued in… so yes, silicone rules!
First Published April 12 2013.
Updated September 2024 to include a link to a recent post from incredibusy about paper clay… here
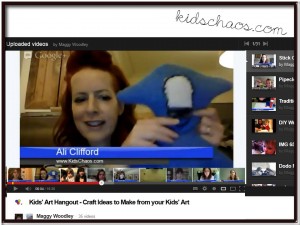
Click this image below to watch the youtube video of our Google+ hangout – and watch Maggy from Red Ted Art sharing her shadow puppet theatre and her ‘everlasting’ picture frame, Playful Learners made another gorgeous puppet theatre Aly at Plus 2 Point 4 showed us how to use a box as a weaving loom, and my fave, Me and My Shadow and her vintage style secret book…
To read more on our gardening adventures click here to see where we got our delicious compost for our seedlings.
The one thing I really struggle to put into the recycling bin, is the toilet roll tubes, I can always think there is SOMETHING we can make with them, whether it’s planting seedlings in them, or making these lovely bird seed feeders. They are so easy to make, and the kids are tickled to be using peanut butter, to spread onto the loo roll tubes, cra-azy eh?!
So simple to do… basically, spread the peanut butter on the toilet roll tube, and sprinkle the bird seeds over the tube, pushing the seeds onto the peanut butter ‘glue’.
We do find some peanut butter a little dry, so – do as you do with toast! – paste a little layer of butter on to the tube before you spread the peanut butter onto the tube.
Then, slip the tube onto a thin branch, preferably in view of the window. We love eating our breakfast and watching the birds eat theirs – we have a favourite chubby blackbird in the garden, will try to get a photo of the bird seed feeder in action!
Even at aged 11 and 9 the boys are LOVING this homemade advent calendar – so easy to make, all you need is some clothes pegs, a colour printer, and some colourful paper bags and you’re away! For a FREE printable sheet of the peg numbers, see below….
CLICK HERE for your FREE downloadable
I’ve simply filled each bag with something different for each day: from chocolate coins, lego characters, gingerbread men, and paper airplane kits (saved the more interesting bits for the weekend dates). And bonus, it works as an incentive too… They can only open the calendar after school, and only if they’ve got to school on time that day too… four days in and all going well! click here to download FREE>
I recently met up with a party of British bloggers at ‘do’ organised by Susanna and Jen from Britmums, and was lucky enough to come away with a few chocolate goodies which found there way into the bags too… they LOVED the chocolate popping candy cracker chocs, such fun!
For more advent calendar ideas, check out the round up over on redtedart.com and for a bit of fun, watch us in a google+ hangout where we showcase LOADS of ideas on your screen here.
Oh, by the way, I’m also on twitter/MoreKidsChaos too… Erm, funnily enough on Google+, Facebook and Pinterest! Pop over say hello x LIKE IT? Pin it!
Chaos writes: So – the challenge to MAKE something with spare jigsaw puzzle pieces… And I think we’ve cracked it with these greetings cards. The shape of the puzzle piece with the ‘sticky out bits’ inspired us to think of Frankenstein’s monster, with the bolts in his neck, so we drew his body attached his head, with some googly eyes and requisite ‘scars’ and away you go! Ideal for a Father’s Day card, or a MONSTER Birthday card . A second idea is a nod to the two parts of the puzzle making ONE, so it’s great for an anniversary, or wedding card. And equally adding a third piece for a new baby card!
And I’ve created FREE printables here for you:
What do you do with all of your children’s art, how can you preserve them as keepsakes?
My 10 yo is always drawing little mono monsters and aliens, so was delighted to be able to preserve his latest creation…. In the form of a 3D towelling monster alien!
We took the drawing, folded it in half, traced over it, onto a large piece of broadsheet newspaper.
Cutting around the shape, we then pinned our newspaper template onto the doubled-over towel, and cut and sewed around the edges. Leaving a corner un-stitched for stuffing the Towel Monster.
We turned the monster, inside out, and used ripped up shreds of plastic carrier bags we had in the cupboard (saving them from landfill!) – He is safely the favourite ‘plush toy’ at bedtime now, and has been on a round trip of the UK to visit various grandparents already! Don’t forget your toothbrush!
click image above to view the kidschaos.com hangout hosted by redtedart.com
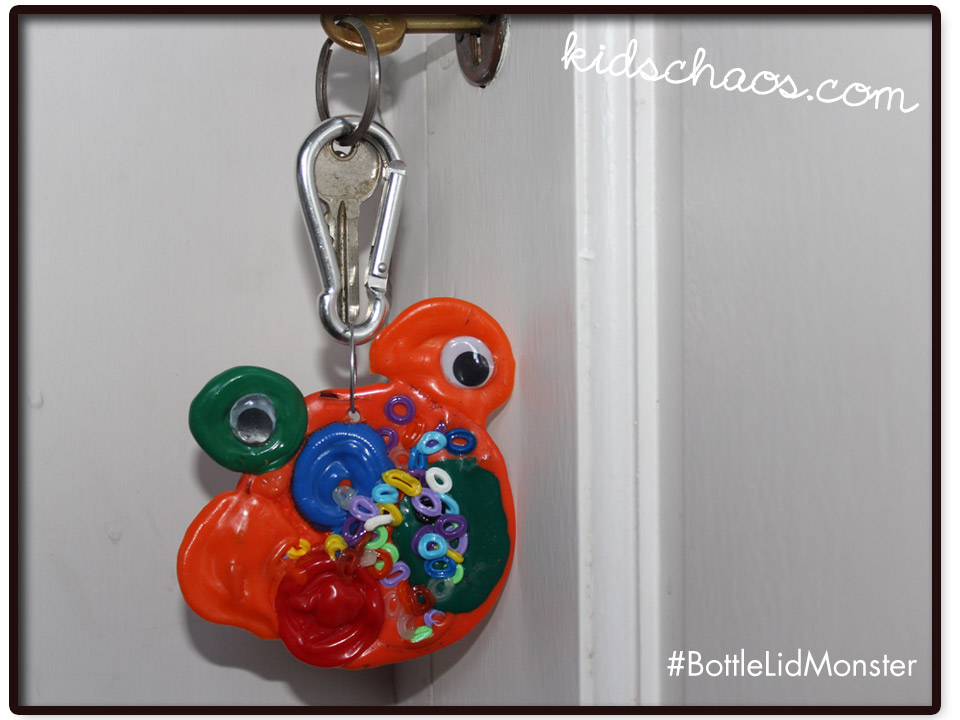
8yo wanted to personalise his book bag so that he can spot it, at a glance, amongst all of the identical school book bags, piled high on the playground floor. So we made the most of the oven being warm from a baked potato supper, and positioned some plastic bottle lids on some foil on a baking tray.
Five minutes later, and as the ‘monster’ started to melt, we added some Hama (or Perler) Beads for a bit of colour, and they melted in beautifully. Bringing it out of the oven to cool (warning, it does get super-hot) we positioned the googly eyes (don’t do that too quickly as the eyes will start to melt too!) I pierced a hole with some scissors, and we added a key ring and out Bottle Lid Monster is complete and ready to adorn said book bag with pride! We also thoroughly enjoyed a Google + hangout with this one too, featuring Maggy’s redtedart‘s bottle lid stamps, and ladybugs. Adele from Playful Learners bottle top Easter art, Anthea at Zingzingtree‘s bottle top flowers and people. Also Cerys’s beautiful bottle top owl, and a first – our anonymous blogger with Spanish Marbles, plus Kath’s KnittyMummy’s beer bottle photo badges.


