crafts, google+ hangouts, halloween, key stage 2, kids

Chaos writes:

kidschaos-dragon-shadow-puppetHere’s a very simple stick craft we’ve been doing this week… great shadow puppets inspired by Chinese New Year:

You’ll need some sticks (!) from the garden, or as we do, collected on weekend walks by small children. Some black card, sellotape, a pencil, scissors and some ‘brads’ (the pins with bendy legs, I never remember what their name is!) Oh, and some coloured tissue paper or sweet wrappers. AND a torch if you fancy doing a shadow puppet show!

We drew the dragon ‘pieces’ out onto the black card – cut them out, and joined them together with the brads (we used a bit of plasticine behind the card, and pushed a pencil through to make the hole for the brad).
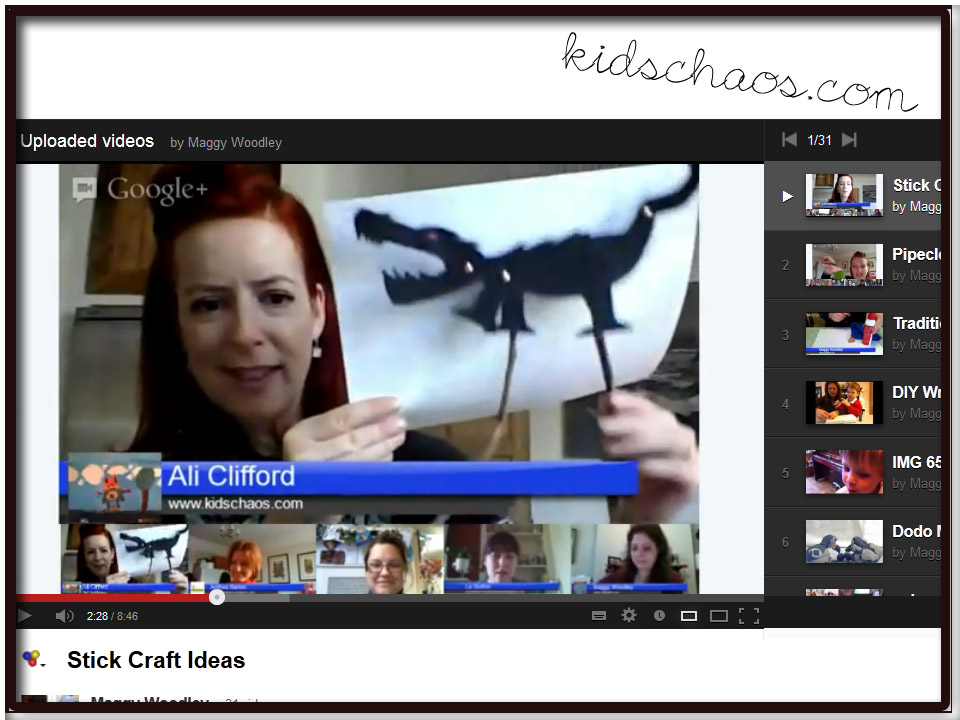
KidsChaosRedTedArt screen grabAttach the sticks with tape at the back and you’re ready to go! You’ll need a couple of characters for the shadow puppet show – standing behind a large white sheet – we dimmed the lights, shone the torch and tried them out. We made up some short stories for our characters and put on a fun silhouette show!!

Click the YouTube link to view the Google+ hangout hosted by Maggy Woodley from Red Ted Art and meet me Ali Clifford at the Stick Craft hangout with Anthea Barton  from Zing Zing Tree, Kelly Innes ( Domestic Goddesque) and Liz Burton.

Don’t forget to head over to Red Ted Art and check out the links for all the crafts featured on the video:

I also write over on www.agreenerlifeforus.com 🙂 and incredibusy.com (first published 2013)

crafts, gardening, gardening with kids, google+ hangouts, kids

Toilet roll crafts – bird seed feeder

Chaos writes:

The one thing I really struggle to put into the recycling bin, is the toilet roll tubes, I can always think there is SOMETHING we can make with them, whether it’s planting seedlings in them, or making these lovely bird seed feeders. They are so easy to make, and the kids are tickled to be using peanut butter, to spread onto the loo roll tubes, cra-azy eh?!

KidsChaosToilet-Roll-craft


KidsChaosRedTedArt-screen-grab3So simple to do… basically, spread the peanut butter on the toilet roll tube, and sprinkle the bird seeds over the tube, pushing the seeds onto the peanut butter ‘glue’.

We do find some peanut butter a little dry, so – do as you do with toast! – paste a little layer of butter on to the tube before you spread the peanut butter onto the tube.KidsChaosToilet-Roll-craft-how-to


Then, slip the tube onto a thin branch, preferably in view of the window. We love eating our breakfast and watching the birds eat theirs – we have a favourite chubby blackbird in the garden, will try to get a photo of the bird seed feeder in action!

To see how our garden grows, follow our Gardening With Kids posts here.

and how to make an indoor watering can here!

To see me demonstrating the making of said bird seed feeder, click the youtube link, watch the video (also embedded below) and be inspired. – I joined the regular Google+ hangouts hosted by Maggy at Red Ted Art with some other fabulous creatives – Chris at Thinly Spread, Liz at Me and My Shadow Owls, Anthea’s Torus at ZingZing Tree, and Rebecca from herecomethegirlsblog. Cat in the Hat craft.

Are you on Google+ Follow me here, and say hello, and I’ll add you back to my circles.

Oh, and I’m on twitter.com/MoreKidsChaos too… Erm, and funnily enough on Facebook and Pinterest! Pop over to say hello x

crafts, create, google+ hangouts, kids, Uncategorized

W is for Whale – paper cup craft

Paper cups are a great asset to a store cupboard… you never know when the post school playdates may descend on you, and for this time of year, paper plates and cups are often safer in the garden for the al fresco dining that may take place!W is for Whale paper cup craft

They are also VERY handy for a last minute craft session, particularly if you are practicing your alphabet crafts – and all you need for this W is for Whale paper cup craft, is two paper cups, some parcel tape and a couple of googly eyes!

You will need:

Two paper cups
Parcel Tape
Googly eyes
Pipe cleaner (white or blue)
Hama or Perler Beads in an array of blues and white!

Instructions:

1) Using the parcel tape, stick the two cups together facing each other to create the body shape of the whale.

2) Wrap the parcel tape all over the body of the whale to cover it.

3) Fashion the whale’s tail from more parcel tape and attach to one end of the paper cup whale.

4) Do the same with the two front flippers, and attach just below the position on the eyes.

5) Add the googly eyes, essential in any paper cup craft!.

6) Pierce a small slit where the blow hole on the top of the whale’s body will be.

7) Push the pipe cleaners, or wires, into the hole, and add some Hama or Perler beads to look like water drops and you are DONE!

For more quick and simple paper cup ideas, check out our Paper Cup Frozen Crown and Red Ted Art’s pom pom party poppers!

Follow Ali on twitter as @incredibusymum and twitter.com/MoreKidsChaos for more posts like this one… Erm, and funnily enough on Google+Facebook and Pinterest! Pop over to say hello x Like it? Pin it! and come say hello at instagram.com/incredibusy too x
Ali also writes over on AGreenerLifeforus.com
crafts, gardening with kids, google+ hangouts, kids, Uncategorized

Follow my blog with Bloglovin
Andy Goldsworthy inspired
FlowersBuildKidsChaosThis week my darling boys got busy with some Andy Goldsworthy style flower arranging! Well, they made some gloopy papier mache glue (recipe here: two parts water, one part flour, nuked in the microwave for 50 seconds…stir stir stir the lumps out as best you can).

Then they painted the patio and started building up their pattern of summer leaves and petals. It has to be said, 10yo particularly LIKES working with colour patterns, you only have to look at his gogo crazy bones collection which he has displayed by colour, and he LOVED David T Waller’s amazing Toy Atlas Rainbow – the hundreds of toy cars… oh, click here to see it…

This is a fabulous way to explore the science of plant decomposition too – watching as the petals’ colour changes over a period of days – and the release of carbon dioxide…

If you’d like to see how our own patio art works with Autumn / Winter leaves – take a look at the ‘sculpture’ we made with the neighbour’s children – read more here, taking inspiration again from the fabulous Andy Goldsworthy and RedTedArt of course.

10yo boy was really excited to tell his Dad all about this, and has decided that he will cover the entire patio for his birthday, in November, so watch this space!

Anyway, as you know, I’m on a weekly panel of crafty So-and-So-s invited to ‘hang-out’ on Google+ by the every lovely Maggy Woodley at Red Ted Art.

I’m hanging out on Google+ for a bit of a vlog…(click the screengrab to watch) with some craft buddies to share these flowers and leaves ideas, hosted by the aforementioned ever lovely Maggy from Red Ted Art. who made flower crowns and showed us how to press flowers and cute woodland people. Also present are Anna, Crystal, Anthea’s wild grass seed head artKelly‘s amazing helicopter seed thank you cards for teachersLiz was featured with her diy flower-petal paintsThe fairy and the frog’s discovery bottle Pop back later for more links soon.

KidsChaosFlowersYouTube

Oh, and I’m on twitter.com/MoreKidsChaos too… Erm, and funnily enough onGoogle+Facebook and Pinterest! Pop over to say hello x Like it? Pin it!

Ali also writes over on AGreenerLifeforus.com
Follow on Bloglovin

crafts, create, kids

Chaos writes:

Half term fun with Fimo – how simple is this! On the way back from the Canal Museum this week, we called into my all time fave shop (well, I was an art student, what do you expect….) And 9yo picked himself a couple of pressies (for being good all week….) – Three packets of Fimo, and some googly eyes!

The chap in the London Graphic Centre at Charing Cross was such a sweetheart too, he kindly offered to bubble-wrap 9yo’s plaster cast of the canal bridge plaque he’d made at the Canal Museum. #hero

We positioned the eyes, took a photo, removed the eyes, baked the characters in the oven, and with our trusty glue gun, stuck them back on, using our photo for position-reference! – Job done!