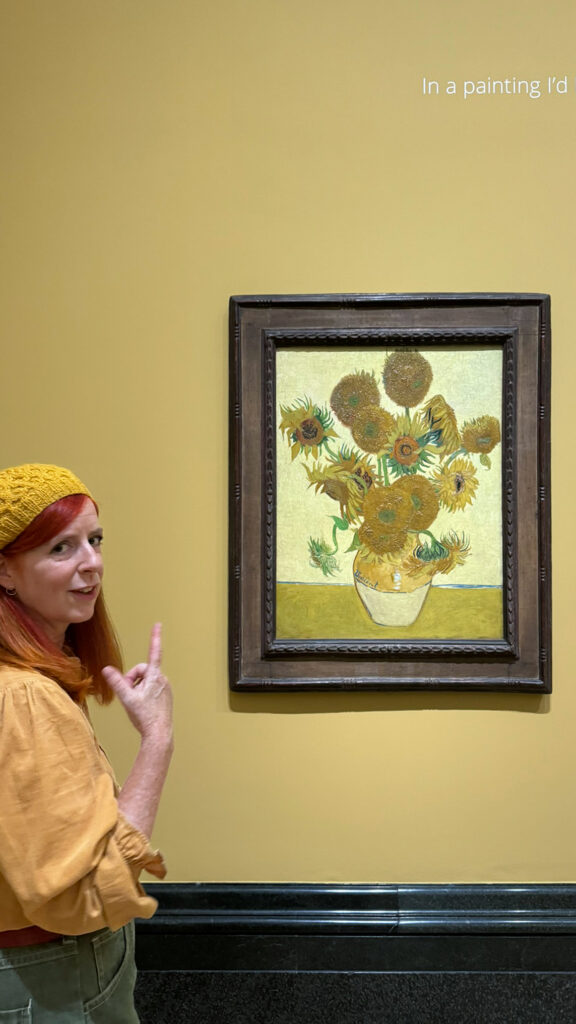
It’s not every day you get to be part of history,but being one of the National Gallery 200 Voices has felt exactly like that. Over the past year, I’ve had the immense privilege of helping celebrate 200 years of this incredible institution, reflecting on what art, creativity, and community mean today.
From wandering the echoing halls early in the morning (before the crowds arrive!) to chatting with fellow creatives and curators about their favourite works, every moment has been a joy. There’s something magical about standing in front of a painting you’ve seen a hundred times, and suddenly noticing the tiniest brushstroke that changes everything.
As the National Gallery turns 200, it’s not just about looking back, it’s about looking forward. I’ve loved seeing how the Gallery has embraced new voices, new perspectives, and the next generation of artists and storytellers. It feels hopeful and human, and I’m genuinely thrilled to be heading to the NG200 party to celebrate the next 200 years.
Of course, being me, I couldn’t resist having a peek at the Gallery shop before the big event – I’ve been eyeing up a few prints and notebooks (I always end up with another notebook). If you’re planning your own visit or just love beautiful art-inspired gifts, there’s a clever way to save a little when you shop online.
If you go via Capital One Shopping’s National Gallery page it shows any current offers or discount codes available for the National Gallery Shop. It’s one of those browser tools that automatically checks if there’s a voucher code floating around, so you don’t have to go searching yourself, quite handy if, like me, you’re easily distracted by the art prints and tote bags!
I’ll share more photos from the celebrations over on @incredibusy
Child’s play may look simple as an observer, however beneath the surface, it’s one of the most powerful learning tools children have. Long before worksheets, structured lessons or formal programs enter the picture, children naturally use play to understand the world around them. And even as educational methods evolve, play remains the foundation of healthy development.
Whether the goal is strengthening communication skills, building confidence or helping your child become the best version of themselves, play provides an environment where learning feels natural, joyful and meaningful.
Play creates a safe space for learning and experimentation
Children learn best when they feel comfortable, supported and free to take risks. Play offers exactly that. In a playful setting, children don’t fear mistakes. They try new things simply because they’re curious. When a child builds a tower that collapses or experiments with new words during pretend play, they’re strengthening critical cognitive and emotional skills without the pressure of perfection.
This sense of safety is especially important for children who struggle with communication or confidence. Whether a child is navigating tricky social interactions or developing language skills, play provides room to explore, imitate and practice. It’s why a child speech therapist often incorporates games, toys and pretend scenarios into sessions. Children stay engaged, and the learning process becomes intuitive instead of stressful.
When kids play, they’re not just passing time. They’re developing resilience, problem-solving abilities, emotional regulation and curiosity. These core skills form the foundation for later academic success and personal growth.
Play naturally encourages communication and language development
One of the most powerful outcomes of play is its impact on communication. During play, children are exposed to new words, concepts, routines and social interactions, often without even realising they’re learning. Whether they’re narrating a pretend cooking session, negotiating rules in a game or explaining their ideas to a parent, play stimulates language in authentic ways.
This is why many therapists and educators use toys, puppets, interactive games and storytelling as tools to build vocabulary and sentence structure. A child might practice turn-taking during a board game or learn descriptive words while playing with sensory materials. Because the context is fun and engaging, the learning sticks.
For families working with a child therapist, play becomes an extension of therapy at home. Parents can reinforce skills through simple routines like narrating actions, labeling objects, asking open-ended questions and joining in their child’s imaginative worlds. Learning through play doesn’t require complicated setups; it simply needs presence and interaction.
Play supports emotional intelligence and social skills
Emotional development happens through lived experiences, and play provides those experiences in abundance. When children take part in cooperative games, pretend scenarios or group activities, they learn how to share, compromise, self-advocate and recognise emotions in themselves and others.
Pretend play is especially powerful. When children act out roles like teacher, doctor, or parent, they explore empathy and perspective-taking. They learn how to express feelings, solve conflicts and navigate relationships in a low-pressure environment.
For children who find social interactions challenging, structured play with guidance from parents or professionals offers essential support. Activities like turn-taking games, role-play or cooperative building projects give them opportunities to practice social skills that become invaluable later in school, friendships and everyday life.
Play strengthens cognitive skills without feeling like work
Cognitive development happens most effectively when children are actively engaged. Play encourages curiosity, exploration and experimentation, all of which drive early learning.
Through play, children strengthen skills such as spatial awareness through building activities, and problem-solving by figuring out how pieces fit.
These skills translate into improved academic performance later. Children who play regularly tend to be more flexible thinkers, better problem-solvers and more confident learners.
Parents can support this by offering accessible materials like blocks, art supplies, and pretend-play kits which allow children to lead the activity.
Play helps children become their best selves
At its core, play helps your child become the best version of themselves. It nurtures strengths, encourages independence and fosters confidence. Instead of pushing children into overly structured learning environments too early, play allows them to learn on their own timeline and in their own way.
In short, play isn’t just for fun. It’s the foundation of healthy childhood development and one of the most effective tools for teaching language, social skills and emotional resilience. By creating space for play, offering gentle guidance and encouraging curiosity-driven learning, families can support children in ways that feel natural and uplifting. In a world filled with structured programs and high expectations, play remains the most powerful pathway to growth.
This is a collaborative post, which allows me to continue creating organic content both here and on incredibusy.com
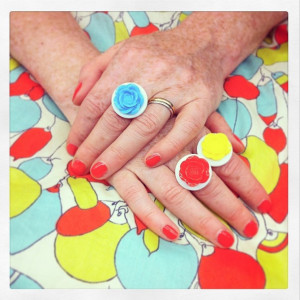
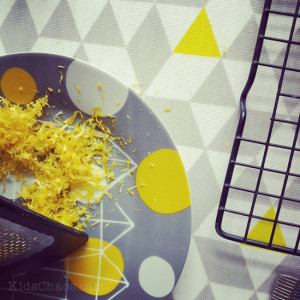
Hello – My name is Ali Clifford and I go by the name of @incredibusy, and I rather like the colour YELLOW.
I think this colour penchant is quite a recent phenomena – if you look through my instagram feed, it seems to be somehow dominated with brights, and spots of yellows – I don’t really think it was intentional, it just seems to evolved that way!
We even had a ‘sogoodineveryway‘ theme a couple of weeks ago! #sgiew_YELLOW click here to read about that.
When I was a child, with red hair and freckles, my mother would tell me, “oh no Alison, you CAN’T wear yellow! It just doesn’t suit you….” so I started rebelling… From my eyeshadow at art school (seriously, not a good look, like a gone-wrong watermelon) to the frocks I wear today.
I’ve all sorts of outfits, and accessories in yellow now, and even have a small collection of yellow shoes.
I’d LIKE to be maybe someone who wears more muted colours – I love the style of friends like Ali Dover – we have similar colouring (oh, and the same name), and she just always looks so fabulous – denims, and stripes, straight out of the Toast catalogue… I do try, but the wabi-sabi in me means I’m better off multi-coloured (and a bit scruffy…)
My favourite flower in the garden happens to be yellow FORSYTHIA – to look out through the kitchen window on a rainy day and see that Forsythia bush shining like the absent sunshine, really lifts my spirits too.
I’ve even started painting furniture in tones of yellow and grey, that combination really works well for me, you can watch me making some desk stationery below in some beautiful fabric by my friend Kate madebymrsm – (oh, and I appear to have a yellow telephone prop too… guilty!) And – really – you have to check out Kate’s hashtag – #100daysofyellowstuff
And finally, I’d like to give a big shoutout to instagram, for helping me find my creativity again – after a long absence from my art school hobby of photography, I’m back in the game – finding the love of yellow peppers – probably my biggest ‘like’ on instagramto date!
Thank you Becky, for the prompt, loving all of the colour stories over on colourlover.co.uk!
Pom pom Bunny has been very popular, we’ve made LOADS of them, and they are pretty easy to make (particularly if you have a pom pom maker!)
This is a really good Spring or Easter Craft, fairly straightforward, and much coveted amongst the kids’ friends. And very simple instructions to make the pom pom bunny.
You will need:
– Two yarn pom poms, one large for the body, one smaller for the head. – Googly eyes – Pink Hama bead/Perla bead or similar, a small pink or red button will do. – Contrasting fabric for the ears.
Make the two pom poms, either in the traditional cardboard doughnuts, or using a fork, or a pom pom maker. We used a hot glue gun to adhere the two pom poms together. You could stitch them together too…
Glue the eyes and attach the ‘whiskers’ and little pink nose with a strong glue.
Using pinking shears, cut the bunny ear shapes, and scrunching them to create creases at the bottom, secure them together with a piece of wool (the same wool as the pom poms so that when you tie them to the bunny’s neck, you won’t see the join).
I think this really makes the pom pom bunny quite unique, and it’s a great way to upcycle old bits of fabric – in fact you may recognise this blue fabric from the leaping rabbits denim pocket purse we made recently too – click here to check that out, you won’t be able to resist having a go at that!.
If you would like to WIN a two pack Pom pom maker from Clover (35mm and 45mm) at Hobbycraft, pop over to our facebook page – LIKE our page, and tell us what you would like to make with this fabulous, easy to use pom-pom maker. (this giveaway has now closed, April 3 2014)
Ali also blogs over on incredibusy.com and is a new lover of Instagram too… pop over and say hello!
Strategic thinking isn’t limited to the boardroom. Children can develop it early through activities that enhance their planning, anticipating, and problem-solving capabilities. Engaging your children in such activities helps form life-long habits of success that may even make learning fun. In this blog post, we will look at some innovative and fun strategies for kids to practice strategic thinking.
Why Strategy Matters for Kids
Strategic thinking helps children recognise the significance of making informed decisions, taking into account possible consequences, and planning ahead. Strategy equips children with important analytical, organizational and adaptive abilities. From managing resources in games and social situations to taking on challenging homework problems, strategy provides them with important abilities such as analysis, organisation and adaptability. By practicing strategic thinking, children gain perseverance, discipline, and creativity, qualities which will serve them throughout their lives. Not only are these abilities crucial to academic achievement, they’re also great for problem-solving, teamwork, and realising personal goals. Encouraging kids early to adopt this mindset gives them confidence and resilience against future obstacles while turning obstacles into opportunities to develop themselves and reach success.
Building Strategy Through Guided Choice
One powerful yet often overlooked way children develop strategic thinking is through environments that gently guide choice rather than dictate outcomes. When children are given structured options, choosing how to approach a task, deciding which materials to use, or planning the order of activities, they begin to weigh possibilities, anticipate results, and take ownership of decisions. Early learning settings that emphasise this approach, such as a sessional kindergarten, allow children to explore planning and consequence in a safe, supportive space where educators prompt reflection rather than provide answers. This kind of guided autonomy strengthens executive function, encourages independence, and helps children understand that strategy is not about being “right” every time, but about making thoughtful choices and learning from what follows.
The Power of Play
Play is one of the best ways to teach children strategy. Kids tend to learn best when having fun, and many games encourage strategic thinking naturally.
Board Games That Build Minds
Time-honored classics such as Chess, Checkers and Risk are effective means for teaching children to think ahead, anticipate opponents’ moves and manage complex situations. But don’t stop with traditional board games. Modern titles like Ticket to Ride, Carcassonne and Catan provide valuable lessons in resource management as well as long-term planning in an entertaining environment. Even simpler titles like Connect Four and Uno require them to consider carefully their next move. View each game as an opportunity to practice patience, consider options and create winning strategies.
Video Games Aren’t Just Fun
Contrary to what many believe, video games can also serve as an excellent platform for teaching strategy. Minecraft promotes creativity while Civilisation introduces resource allocation and decision-making. Even battle royale games or puzzle-based adventures offer kids the chance to practice anticipating outcomes and refining problem-solving skills. Minesweeper is one such example that encourages both strategic thinking and logical deduction. Plus, digital mediums often engage kids more readily than traditional methods, just be sure to balance screen time with offline activities to maintain healthful results.
Strategy in Action
Beyond games, there are daily opportunities to help children develop strategic thinking abilities.
Puzzle Solving
Puzzles offer children an engaging way to discover patterns, think creatively and form strategies while exercising their minds and building problem-solving skills, not to mention increasing confidence with every successful solution. They can also be tailored specifically to different age groups and abilities so everyone can participate and benefit. From assembling picture pieces or solving challenging riddles, puzzles provide fun yet stimulating exercises designed to help form cognitive growth while also spark curiosity among young learners.
Everyday Problem-Solving
Real world scenarios like planning a family outing or making choices at the grocery store provide excellent opportunities to introduce strategy into everyday situations. You could ask your child for assistance in selecting an efficient route or finding deals in store. These practical problem-solving opportunities bring strategy into their life easily and accessibly.
Active Learning Through Sports and Teamwork
Sports provide children an ideal venue for practicing strategy as they collaborate, adapt, and anticipate in a team environment.
Individual and Team Sports
Sports like soccer, basketball and tennis provide children with ample opportunity to practice quick decision making under pressure and long-term mental agility. Children learn how to analyse opponents, respond under pressure and adjust tactics quickly without losing focus. An invaluable lesson in flexibility. Other individual sports, like martial arts or gymnastics emphasise goal setting while using tactical thinking for improved performance.
Group Projects and Classroom Work
School assignments provide another means of helping kids develop strategic thinking skills. Give your child leadership roles within tasks to encourage them to develop plans, evaluate options, and coordinate their team. Although not as thrilling as playing kickball games, similar principles apply and can sharpen strategy even in academic environments.
Learning From Stories
Young minds can be deeply influenced by stories and narratives. So why not use them to facilitate strategic thinking?
Books, History, and Role-Playing
Introduce books or historical accounts that focus on strategic moments to spark curiosity and help form brainstorming sessions. Alternatively, consider role-playing games where children “step into” other people and learn to make plans and decisions through simulation of real-life situations. Dungeons & Dragons games can be especially effective here.
Encourage Reflection
Reflective thinking is just as integral to strategic thinking as making decisions. Without it, kids might never learn from past errors or improve upon future strategies.
Journaling and Tracking Progress
Encourage your child to keep a journal of all of the games they played, challenges they experienced, lessons they learned, and self-awareness activities they do each day. Doing this allows them to reflect upon their experiences, understand how their strategies change with time, identify patterns in their thinking patterns that need improving upon, as well as new approaches for improvement. Journaling helps form self-awareness and critical thinking allowing kids to celebrate achievements while reflecting upon setbacks as a way of strengthening both their strategic skills as well as their confidence levels over time.
Celebrate Successes (and Failures)
To form an environment in which mistakes are seen as opportunities to grow, celebrate not only your child’s victories but also their creative attempts and efforts. These activities help build resilience and confidence while teaching challenges to be seen as part of learning processes. By rewarding such behaviors with positive reinforcement you help to form their resilience, teaching how to adapt creatively while appreciating both effort and progress as important components.
Conclusion
Strategic thinking is a skill that is developed through practice, so the sooner kids start, the better prepared they’ll be for life’s challenges. From honing skills through games to solving daily life problems or looking back on past decisions, strategy can be found everywhere. Remember not to push your child into becoming an overnight master strategist but rather to form growth through creating opportunities, nurturing curiosity, and keeping things lighthearted. Every great thinker started somewhere.
In the classroom, your kids learn about a range of academic subjects, and the basics like how to read and write. They gain the foundations for a fulfilling life through interactive classes at school and as you help with their homework. Children are also learning many soft skills, and you may not realise the many ways your child is developing to one day be a well-rounded adult.
What are ‘Soft Skills’?
This term refers to general traits that help individuals relate better to and get along better with one another. These interpersonal skills can help them professionally in the workplace, as they get along well with coworkers, and personally, as they form friendships more easily and appreciate others. Below are four soft skills they learn in a quality educational environment.
Great Teamwork
Along with learning about numbers and spelling in school, children also learn from teamwork. They can learn how to problem solve in classes with group projects, for example, to help them become strong at critical thinking. They also learn how to work together toward a goal, such as completing a cake recipe or developing a class presentation together. Kids can also develop friendships with classmates who teach them about respecting someone else and having empathy and compassion.
Strong Communication
There are many ways to communicate at any age. That includes verbal and written. A couple of other ways that you might not have readily thought of are drawing, reading and listening. Becoming good at communicating involves all of these areas, and it is important for students to excel in this area as it will help them form connections with others. That can prevent social isolation, sadness, hopelessness, and reduced self-esteem. Feeling more confident can help kids and teens do well in academic classes as they believe in themselves.
Leadership Skills
The beginnings of being a great leader can be seen in many children inside and outside the classroom. For example, they may try many sports and need to be resilient if they do not make the team or their team does not win every game. They may also want to volunteer from a young age and be great at managing their time. These skills are reinforced in quality state and boarding schools, where the focus is on personal growth and learning.
The Basics of Manners
Good manners are important in social life; developing them can happen in school. That could be the words “please” and “thank you”, as well as keeping the door open for the person behind them, these activities show respect and appreciation for other people. Youth can also practice sharing with their classmates to teach them positive interactions with others as part of healthy development.
Summary of School Skills
Kids learn more than just academics at school. They also build soft skills, from teamwork and communication to creativity and leadership, which can prepare them for future school years and adulthood afterward. Ask your children what they are learning in class, and their responses are likely to pleasantly surprise you.
Arts and crafts have long been a beloved pastime, offering a way to unleash creativity, create personalised decorations, and make heartfelt gifts. No matter the holiday, from Christmas to Halloween, Thanksgiving to Easter, crafting can elevate celebrations with handmade charm. In this article, we explore some of the best arts and crafts ideas that suit any holiday, along with tips to make your projects stand out.
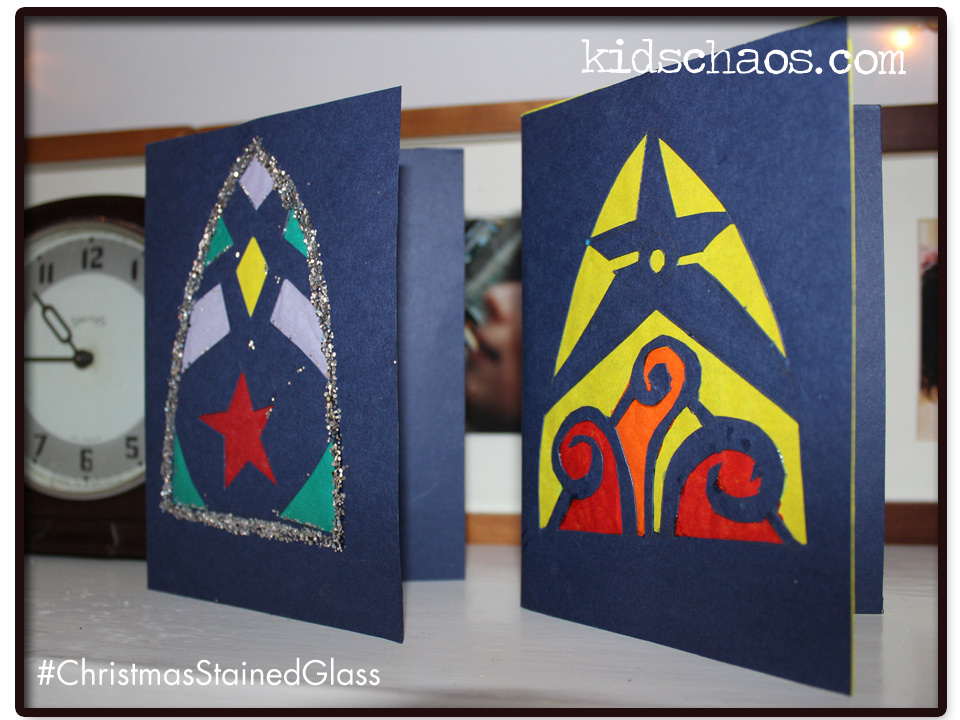
1. Personalised Holiday Cards
There’s something special about receiving a handmade card. Personalised cards let you tailor designs to specific holidays, whether it’s Valentine’s hearts, spooky Halloween scenes, or festive Christmas trees. You can use:
Watercolors or Acrylic Paints: Create unique designs with vibrant colors.
Calligraphy or Hand Lettering: Add elegant, custom messages.
Stamps and Embossing Powders: Bring texture and dimension to your creations.
If you’re short on time or want professional-looking designs, using Christmas SVGs free templates can add flair without the effort of drawing from scratch. Simply cut the designs with a Cricut or Silhouette machine, and voila—your cards are holiday-ready!
2. Holiday-Themed Mason Jars
Mason jars are versatile and can be transformed into charming holiday décor. Here are some ideas:
Halloween Lanterns: Paint jars with spooky faces or wrap them with gauze for a “mummy” effect. Add a tealight candle inside to create a glowing lantern.
Christmas Snow Globes: Fill jars with faux snow, mini trees, and small figurines. Seal the lid and shake it for a magical effect.
Easter Treat Jars: Paint the jars in pastel colors, add bunny ears to the lid, and fill them with candy.
Mason jar crafts are not only decorative but also make great gifts, especially when filled with homemade goodies like hot cocoa mix or cookie ingredients.
3. DIY Wreaths for Every Season
Wreaths aren’t just for Christmas! With a little creativity, you can design a wreath for any holiday:
Spring/Easter Wreaths: Use pastel flowers, greenery, and egg-shaped decorations.
Fall/Thanksgiving Wreaths: Incorporate autumn leaves, mini pumpkins, and burlap ribbons.
Patriotic Wreaths: Use red, white, and blue elements for holidays like Independence Day.
Creating a wreath is simple with a basic grapevine or foam base. Add elements using a hot glue gun and hang it on your door to welcome guests in style.
4. Handmade Ornaments and Decorations
Making your own ornaments allows for a personal touch during the holidays. Here’s how you can customize them:
Christmas Ornaments: Use clear ornaments to fill with glitter, paint, or miniature scenes. For a rustic look, try wood slice ornaments with painted designs.
Valentine’s Day Décor: Create heart-shaped garlands with felt or paper. Hang them over doorways or windows for a festive touch.
Fourth of July Décor: Craft stars from paper or fabric and string them into garlands for a patriotic celebration.
These handmade items are perfect for adding a personal touch to your home or giving as gifts.
5. Holiday-Themed Candles
Candles are a timeless holiday craft, adding ambiance and warmth to any celebration. You can customize them in a variety of ways:
Scented Candles: Add holiday-inspired scents like cinnamon, pine, or peppermint.
Decorative Candles: Use stencils or decals to add festive designs to plain candles.
Layered Candles: Create multi-colored layers that reflect holiday themes, like red and green for Christmas or orange and black for Halloween.
Candle-making kits are widely available and make the process simple for beginners.
6. Painted Rocks for Every Occasion
Rock painting is a fun, budget-friendly craft that works for all ages. You can create:
Easter Egg Rocks: Paint rocks to look like Easter eggs and hide them for a unique egg hunt.
Spooky Rocks: Design rocks with ghost, witch, or pumpkin faces for Halloween.
Holiday Messages: Write inspirational or holiday-themed quotes on rocks and place them around your garden or give them as gifts.
Seal the painted rocks with a weather-resistant varnish to ensure they last.
7. DIY Table Centerpieces
A festive centerpiece can transform your holiday table. Consider these ideas:
Thanksgiving Cornucopia: Fill a woven basket with gourds, leaves, and seasonal fruits.
Christmas Candle Display: Arrange candles of varying heights with pinecones and holly.
Springtime Floral Arrangements: Use fresh flowers and pastel-colored candles for Easter or Mother’s Day.
Centerpieces can be as simple or elaborate as you like, making them a versatile option for any holiday.
8. Handmade Gift Wrap and Tags
Why buy gift wrap when you can make your own? Custom wrapping paper and tags add a special touch to any present:
Stamping: Use holiday-themed stamps and ink to decorate plain kraft paper.
Natural Elements: Incorporate sprigs of pine, dried orange slices, or cinnamon sticks into your wrapping for a rustic look.
For gift tags, cut shapes from cardstock and embellish them with stickers, ribbon, or calligraphy.
9. Holiday-Themed Tote Bags and T-Shirts
Personalized clothing and accessories are not only fun to make but also useful:
Fabric Painting: Use fabric paint to create holiday-themed designs on tote bags or t-shirts.
Iron-On Transfers: Print designs and apply them to fabric using a heat press or iron.
Embroidery: For a more advanced craft, add embroidered holiday motifs to clothing.
These items make fantastic gifts and can also be used to carry holiday essentials.
10. Baking and Decorating Cookies
While not a traditional craft, decorating cookies is a creative activity that doubles as a delicious treat. You can:
Use Royal Icing: Create intricate designs on sugar cookies shaped like holiday symbols.
Make Gingerbread Houses: Build and decorate miniature houses with candy and icing.
Themed Cupcakes: Decorate cupcakes with fondant or piped frosting in seasonal colors.
Hosting a cookie decorating party is a fun way to engage friends and family in holiday preparations.
There You Have It
No matter the time of year, crafting is a delightful way to celebrate the holidays and add a personal touch to your home and gifts. Whether you’re painting rocks, designing wreaths, or making personalized candles, these arts and crafts ideas will spark joy and creativity. With just a few materials and some imagination, you can create beautiful decorations and keepsakes that make every holiday memorable. And don’t forget to explorefree templates for added inspiration and ease in your crafting projects!
Being a mom (or indeed, a mum) can be an exciting, chaotic adventure, but that doesn’t mean giving up your personal style. While the “mommy look” may come with stereotypes attached, that doesn’t have to mean living in yoga pants and ditching makeup forever. Accepting your new role while remaining true to yourself is completely achievable. Don’t feel the pressure to go out with a full face on, however, here’s how you could combine practicality with personality so that you look and feel just as fabulous as before.
Parenthood often forces your schedule around nap times and school pickups, but finding the balance between chic and convenient can be done. Start by investing in good quality staple clothing pieces, a ‘capsule collection’ if you like, that can manage your busy lifestyle. Classic jeans are great, along with stylish tops that allow free movement, and BF access if needed, and layering is your friend here for sudden temperature shifts and adding depth to an outfit. Add statement accessories like a beret, bold sunglasses or colourful scarves for quick wins of style without compromising comfort.
Embrace the Power of Makeup and Simplicity
Time is of the essence in the mornings, so making each moment count with an efficient makeup routine can make all the difference. Try investing in quality BB cream for quick application and an instant hint of glow. Mascara and tinted lip balm often suffice in creating an attractive appearance. Natural yet put-together looks help maintain that ever-elusive sense of self while meeting daily demands.
Hairstyles That Work as Hard as You Do
On those busy mornings when time is of the essence, having a versatile and easy hairstyle can be your ally. Look for styles that transition seamlessly from playdates to board meetings. Ponytails or quick top knots may come to the rescue. More complex styles could include heatless curls – twisting your braids the night before so they will unfold into beautiful waves by morning.
Utilise Tutorials for Your Hairstyle
The internet offers numerous hairstyle tutorials that can help simplify your morning routine. From quick buns and braids to elegant updos and more, online resources have you covered for any type of style you might be in search of. YouTube and Pinterest offer step-by-step guides from professional stylists and everyday enthusiasts alike, giving you access to invaluable tutorials that can teach you techniques that will enable you to transform your look with minimal effort. Investing a small amount of time learning from these videos could equip you with techniques for effortlessly altering your look. Start with a low ponytail tutorial as your starting point, and add twists or braids for unique variations. Not only will this approach save time but it’ll also inspire creativity allowing you to experiment and discover styles that suit both your personality and daily needs.
Accessorise Carefully
Accessories are the perfect way to give your hairstyle an added layer of character and add flair. Just a few clips, pins or headbands can transform even a basic style into an eye-catching one in no time at all. For busy mornings and reduced effort required in using accessories such as hats, or hair scarves which tie quickly in just seconds while adding instant style. Headbands also work great at taming flyaways while adding flair.
Adorn with Jewellery
Jewellery is an age-old way to complete any look and make a statement. From delicate necklaces to bold bracelets, the right piece can elevate any ensemble and add flair and charm. Bracelets for women in particular are versatile accessories that can be styled for both formal and casual events alike. Their minimalist designs or intricate, gemstone-encrusted pieces add sophistication and charm, reflecting your individuality as part of an ensemble. The ideal way to express your style.
Self-Care Isn’t Selfish
Being a mom may make time for “me-time” seem impossible. Yet prioritising yourself is important not only to maintaining sanity but also expressing yourself uniquely. Find activities that help ground and rejuvenate you such as monthly spa visits or reading a favourite book before bed, anything that helps keep the balance. Being a parent shouldn’t take over who you are as an individual.
Find Joy in Making Your Own Rules
Now is the time to forge your own path towards fabulousness. Fashion doesn’t come with one size fits all rules, rather it should be an exciting journey filled with trial-and-error. Have fun experimenting and switching patterns or looking into diaper bags that could double up as fashion accessories. There isn’t an obligatory style guide attached to parenthood, feel free to make up rules as you go.
Revel in Your Natural Beauty
When it comes to personal style, embracing your natural beauty is an age-old approach that never goes out of style. Letting your natural hair texture flourish and showing off unique features can be very empowering and liberating. Not that this means forgoing makeup or styling completely, just focus on accentuating natural features instead. Using gentle plant-based products for skincare purposes as well as maintaining an effective routine that addresses skin needs will create radiant canvas complexions. Staying natural simply means acknowledging and celebrating what makes you beautiful.
Conclusion
In motherhood (or fatherhood), remember who you are first, an individual first and foremost. Your style reflects this identity through stitches, stains and all. Adopting parenthood doesn’t have to mean forgoing your personal flair. With some creativity injected into daily activities you can navigate “mommy look” gracefully and enthusiastically. Be the stylishly unique lighthouse standing proud on shore among parenting cliches.
Making a Dream Catcher using natural, found objects and at the same time ticking the boxes of three STEAM (Science, Technology, Engineering, Maths and the Arts) practices:
The Science (making dough with salt, water and flour for the beads)
The Arts (designing and sculpting the salt dough leaves, and assembling your dream catcher)
The Maths (geometry of weaving a pattern with a single length of twine)
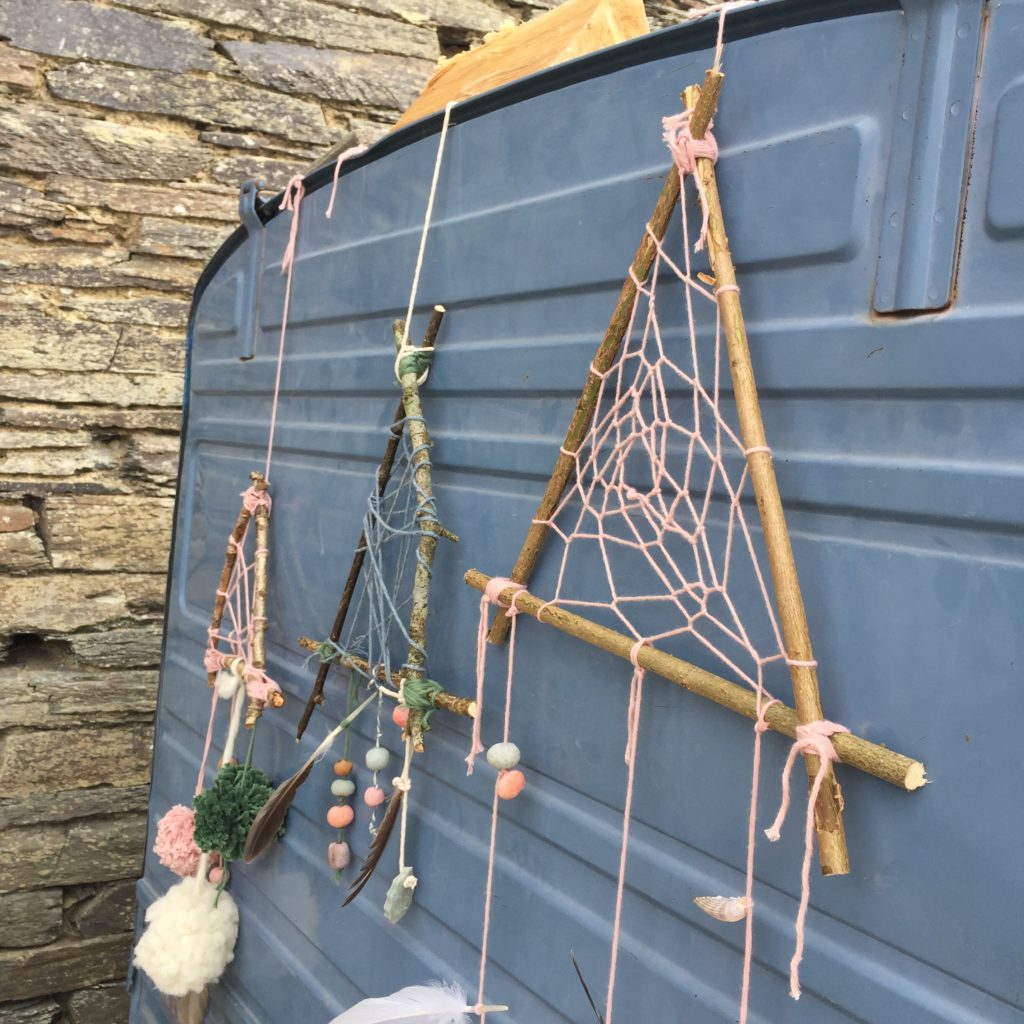
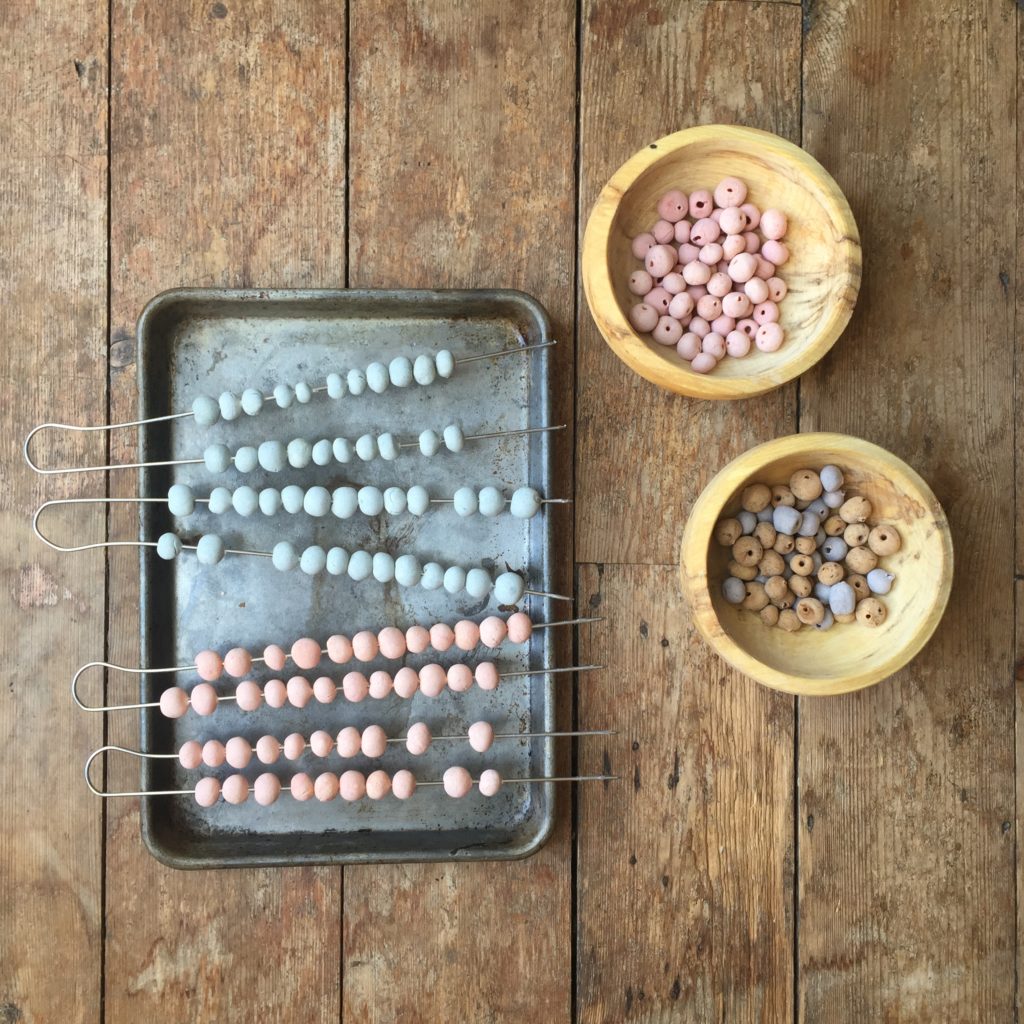
dream catchers, with natural cotton yarn and handmade salt dough beads
This is such a fun project. And one that you could do either indoors or outside in the warmer weather – we really love a craft that all ages can enjoy – and this three sides dream catcher can be a bit of a challenge when it comes to the weaving, so we will link some YouTube tutorials at the foot of this article so that you can get acquainted with the dream catcher weaving geometry at your leisure.
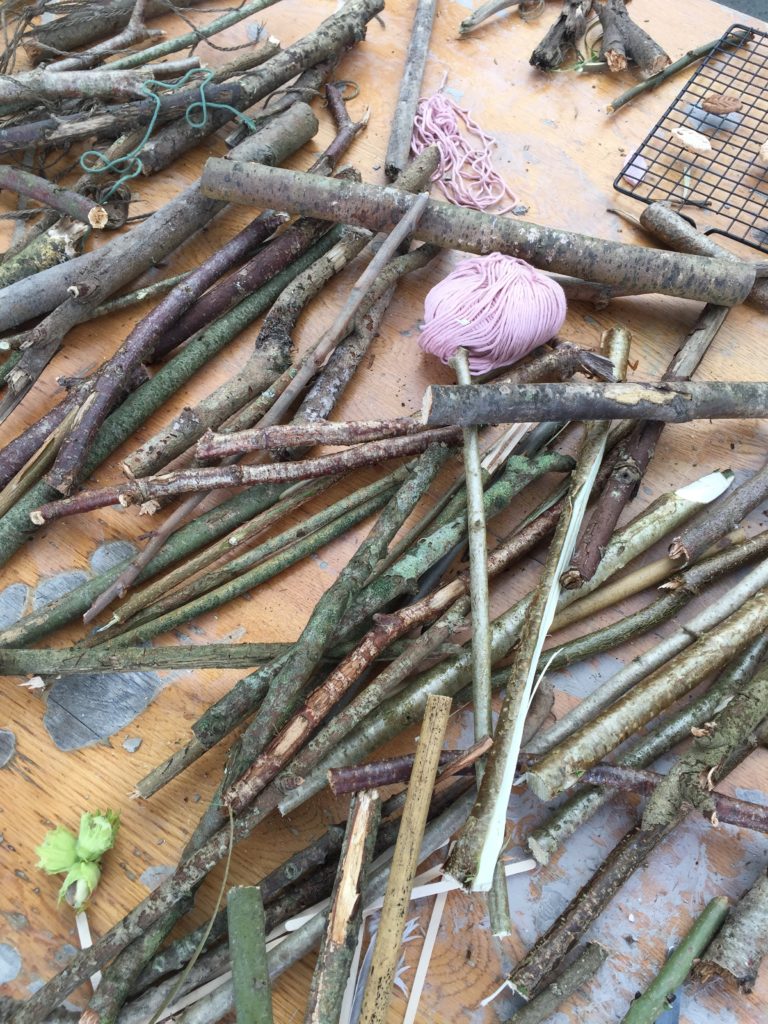
Before you get started, make sure you have everything you need for your beautiful natural dream catcher – go on a nature hunt, look for feathers, acorns, pine cones, and lots of sticks!
You’ll need some cotton string, or strong yarn, and we also made some colourful salt dough beads and ‘leaves’ so that everything is biodegradable – this means you can eventually hang your dream catchers outside in the garden or the woods, for them to let nature decay them – hey, that may even be a bit of a science lesson right there too!
Salt dough leaves and beads recipe
1 part salt
2 parts plain flour
half to one part water
optional – some natural food colouring (if you are feeling ambitious – you could go as far as making your own dough dye with beetroot! hey – experiment, have some fun)
We mixed the dough into three bowls, and added three colours – subtle so that they would blend well with nature – and rolled small balls, pushing a skewer through to make a bead, we dried the beads by ‘stringing’ them onto metal skewers and propping up off the baking tray to harden in the oven on a very low 100 degrees temperature, checking on the beads after about fifteen minutes, and turning them on the skewers so that they didn’t stick.
The leaves we made by rolling the dough out to about 5mm thick, and used a leaf shaped cookie cutter and a knife to score the marks on the ‘leaves’ and push a hole at the top of the leaf to allow it to be attached to the dreamcatcher. Again, we allowed these leaves to harden, baking them at the bottom of the oven, for about half an hour to an hour, using a cooling rack from the kitchen. We made these beads and salt dough leaves in advance of our dream catcher construction to allow them to harden – word of warning – don’t let them get damp, they will go soggy!
The assembly of your dream catcher
Now you have everything you need, start to pull it all together. Make a triangle from three sticks of the same length, tying them tight in each of the three corners.
Make a ‘bobbin’ with one short stick, about 4cm long, wrap the yarn around and around until it’s full of yarn – (you’ll have to experiment, but you’ll need enough yarn to create the geometrical pattern on the dream catcher ‘web’).
Using the yarn on this bobbin, start by tying a knot next to one of the three corners of the triangle frame.
Get weaving that web
As you start to ‘weave’ your web the first row can be quite loose. Evenly spaced, start to work the yarn around the triangle:
Pass the end of your yarn around a stick.
Bring the end under the straight part of the yarn.
Bring the end up and pass it through the eye of the loop you just made.
Pull it tighter to complete a half hitch.
Tie the hitch the same at each intersection of the yarn.
Continue around the triangle, to ‘row two’ in the same way, see diagram (and the video links below)
The next hitch is made at the midpoint of the first loop in the first row.
As you tie these hitches you start to pull each stitch in the web a little tighter. Continue around the web tying a hitch and pulling tighter on each row until you are down to a small centre hole in your web. Tie it off in a knot.
Now tie three strands of yarn from the ‘bottom’ of the triangle and attach the beads, feathers, leaves – And tie a hanging loop at the top of the triangle and you are ready to decorate the trees by hanging your wonderful dream catchers in the forest – or, if you REALLY want to catch those dreams in your web, hang your natural dream catcher up in your bedroom for a real conversation starter!
Sleep well, and sweet dreams.
We would love to see what you create – do tag us on Instagram where you will find our new account https://www.instagram.com/kidschaos_blog/ use the hashtag #31DaysofLearning as we are joining in with KiddyCharts creative STEAM project this month.
Fairy Tale crafts – taking inspiration from Snow White and the Seven Dwarves we decided to upcycle a charity shop mirror and create the famous Mirror Mirror on the Wall….
This was a fabulous team effort, and my son now proudly has this Fairy Tale Craft beauty hanging on the wall in his bedroom.
You will need:
Old sheets of newspaper
Cocktail stick
Glue stick
Stronger glue, (I recommend a glue gun!)
Instructions:
1) Roll the newspaper sheet diagonally from the corner, using the cocktail stick to get you started, so that the roll is nice and tight. When the cocktail stick starts to disappear inside the paper, gently pull it out, and continue to tightly roll the newspaper to create a long ‘stick’ – the first of MANY!
2) Flatten the ‘stick’ using a hard surface.
3) Taking your cocktail stick, start to roll the flattened ‘stick’ into a tight spiral, securing it with glue as you get to the end of the spiral.
4) When you have enough of these spirals, you can start to build up the pattern around the mirror – we found that the glue gun was the best tool for this!
You could also spray paint the spirals, however we like the newspaper spirals in their natural form!
Ali also blogs over on incredibusy.com and is a new lover of Instagram too… pop over and say hello! And I’ll be adding this to Lizzie’s#MagpieMonday as I love to salvage, upcycle and re-use stuff!
If you’d like to see more Fairy Tale crafts, firstly pop over to see our Jack and the Beanstalk Reward Chart, and then click the youtube link here, as I got together with Missie Lizzie who talked magic beans, Anthea with her elves’ shoes, Kelly talked Rapunzel, and Maggy at Red Ted Art (talking three little pigs) who hosted a Fairy Tale Craft google+ hangout.


 Hello – My name is Ali Clifford and I go by the name of @incredibusy, and I rather like the colour YELLOW.