create, easter, google+ hangouts, kids

Paper plate flower crafts fascinator

We are loving Paper plate flower crafts and experimented to make a paper plate flower fascinator! Experimenting with paper plate crafts have really inspired us this week, from cookie gift boxes to Paper plate flower crafts fascinators, if you’d like to know how to make this, read on!

Paper plate flower crafts fascinator how toThis fascinator is made from just one paper plate… the flower in the centre, is made from the centre of the plate, and the two flowers with petals, are made from the two halves of the outer circle of the plate. If you would like to see more paper plate flower crafts, click the youtube image below to watch our Google+ hangout hosted by the wonderful Maggy at RedTedArt.com who made some simple paper plate nests for her pom pom chicks and the most beautiful woven paper plates too. Also present were Rebecca from herecomethegirls, with her paper plate daffodils, Emma with her mylittle3andme spiders and bird feeders, Cerys at RainyDayMum, and Anthea at ZingZingTree.

you tube google + hangoutFor full instructions on how to make a paper plate cookie gift box, click here, includes a very simple ‘how to’…

Ali also blogs over on aGreenerLifeforus.com and is a new lover of Instagram too… pop over and say hello!


crafts, create, easter, key stage 2

Pompom bunny

Pom pom Bunny has been very popular, we’ve made LOADS of them, and they are pretty easy to make (particularly if you have a pom pom maker!)

This is a really good Easter Craft, fairly straightforward, and much coveted amongst the kids’ friends. And very simple instructions to make the pom pom bunny.

You will need:

– Two pom poms, one large for the body, one smaller for the head.
– Googly eyes
– Pink Hama bead/Perla bead or similar, a small pink or red button will do.
– Contrasting fabric for the ears.

Make the two pom poms, either in the traditional cardboard doughnuts, or using a fork, or a pom pom maker. We used a hot glue gun to adhere the two pom poms together. You could stitch them together too…

Glue the eyes and attach the ‘whiskers’ and little pink nose with a strong glue.

pompom bunny ears

Using pinking shears, cut the bunny ear shapes, and scrunching them to create creases at the bottom, secure them together with a piece of wool (the same wool as the pom poms so that when you tie them to the bunny’s neck, you won’t see the join).

I think this really makes the pom pom bunny quite unique, and it’s a great way to upcycle old bits of fabric – in fact you may recognise this blue fabric from the leaping rabbits denim pocket purse we made recently too – click here to check that out, you won’t be able to resist having a go at that!.

pom pom makerIf you would like to WIN a two pack Pom pom maker from Clover (35mm and 45mm) at Hobbycraft, pop over to our facebook page – LIKE our page, and tell us what you would like to make with this fabulous, easy to use pom-pom maker.

Ali also blogs over on aGreenerLifeforus.com and is a new lover of Instagram too… pop over and say hello!

baking, cooking with kids, crafts, easter

Paper plate crafts – cookie box

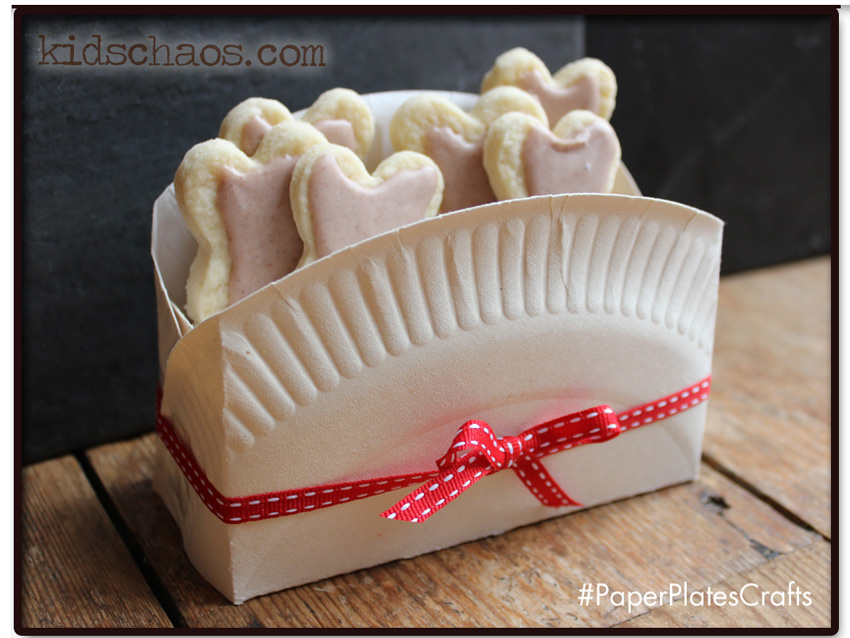
Paper Plate craft - cookie boxHow about this paper plate box? Paper plate crafts don’t have to be just ‘making faces’ or using them for wheels…

They also have very practical uses, and this paper plate box works on so many levels! We have used the paper plate to create a little cookie box, which is the perfect size for holding our Bunny Biscuits, and will make a great Easter Gift for Granny and Grandma.

I had planned to make these paper plate boxes for our next School cake bake sale, as we have a little tradition at our school – the kids get sent home with a paper plate, which has a sticker reading  “Fill me up with treats & cakes, bought or baked, whatever it takes”.

And my lovely friend Nellie (smallbumbigadventure.wordpress.com) sent me a ‘how to’ that she had found on Pinterest, so we tried it out, and photographed a ‘how to’ of our own to pop on the school facebook group page so that the kids can have a go at making them too! It has inspired 9yo and he’s been experimenting with all sorts of different ways to fold the paper plate, so that the front section is lower than the back, and it has to be said, when you ARE deciding which is going to be the front of the box, be sure to have the side flap folding towards the back for neatness…!

paper plate craft biscuit box

For full instructions on how to make the Bunny Cookies, click here, includes a fuss-free recipe for Royal Icing too…

Ali also blogs over on aGreenerLifeforus.com and is a new lover of Instagram too… pop over and say hello!

baking, cooking with kids, crafts, easter, kids

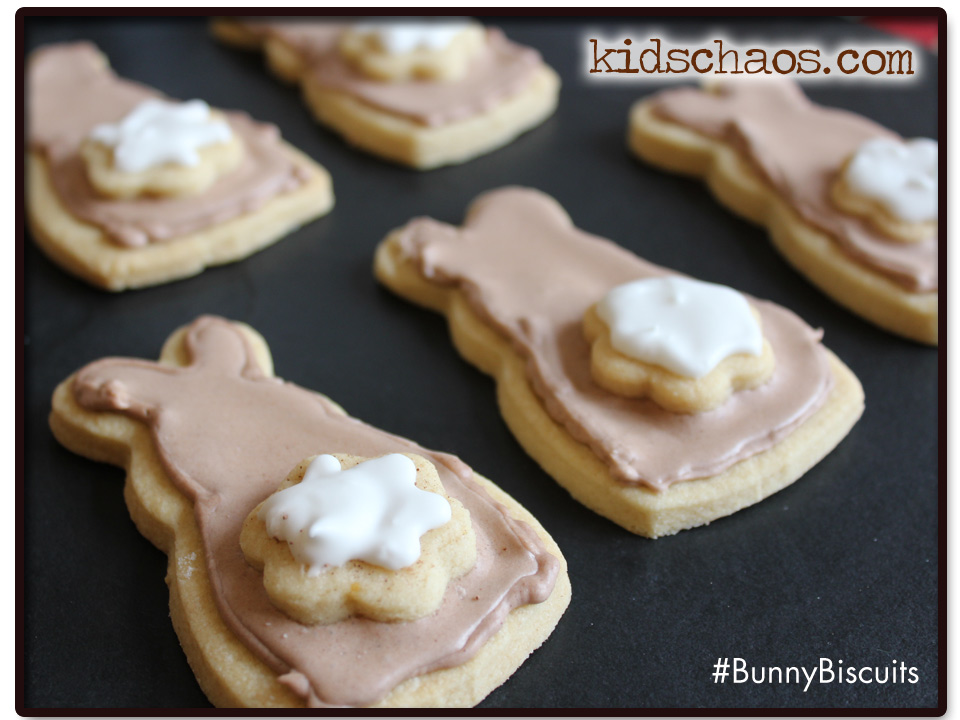
 With Spring almost here, and Easter around the corner, we thought we’d rustle up some rabbit cookies – or bunny biscuits as we’ve named them! It was a great introduction for 9yo to practice his royal icing piping, and ‘flooding in’ – we learnt a LOT about icing technique!

bunny biscuits royal icing

There are LOADS of bunny cookie cutters around at the moment, we had one which was my Mum’s and for the tail you could use a flower cutter, or a small circle…

We used up some royal icing which had been in the fridge for a couple of days, and we have some TOP TIPS for you about this…see below!

Ingredients:

50g fairtrade caster sugar
100g butter
175g plain flour

Method:

Heat the oven to 150 degrees C (300 F, Gas mark 2)
Cream the caster sugar and the butter together, slowly adding the flour, mixing together to form a dough, I find we need to add a couple of drops of water, knead together to form a ball.

Roll out the dough, on a floured surface, to about 4mm thick.
Using your bunny shaped cutter, cut the dough, and place your bunnies and tails on a lightly floured baking tray, and bake for about 20 minutes, until golden brown. (feel free to make some spare rabbit tails… to munch on whilst you’re icing the rabbit cookies!)
KidsChaos-Bunny-Biscuits-royal-icing

bunny biscuits

As they cool down, you can make your royal icing (recipe here). Or if you are using some icing which you have been keeping in the fridge, as we were, TOP TIP make sure you really really stir the royal icing to get ALL of the lumps out, otherwise it sticks in the piping bag – and clogs the nozzle so that when you are piping the outline it stutters out, and the line will be all wobbly… 9yo wanted a pale brown bunny, so we mixed in his favourite hot chocolate mix, into a portion of the white royal icing and some more Fairtrade icing sugar, so that it’s quite thick to pipe the outlines. When this outline is dry, you add a drop of water to the remaining brown mixture, so that you can spoon it into the outline, and using a cocktail stick, gently ‘flood’ the biscuit, and prick any little bubble that appear.

Pop the ‘tail’ into position whilst the ‘flood in’ icing on the rabbit cookie is still wet, and pipe on the remaining white royal icing to make a fluffy tail!

red-ted-art-google-plus-hangout-kids-chaos-rabbits

For more Spring baking ideas, check out the daffodil cookies here and if you are after some more rabbit crafts have a look at my denim pocket purse with leaping rabbits here (FREE printable) – and watch our latest google+ hangout hosted by Maggy at Redtedart featuring Anthea, Lizzie, myself and Kelly – a great selection of Bunny Crafts!

For easy to follow instructions on how to make a little gift box from a paper plate, perfect for these cookies, please click here.

Tasty Tuesdays on HonestMum.comAli also blogs over on aGreenerLifeforus.com and is a new lover of Instagram too… pop over and say hello!

crafts, easter, FREE printables, kids

Leaping rabbits and hares have a real Spring feel about them don’t they? I’ve been doodling them forever, so I thought I’d put them to good use, and couldn’t get the Chas and Dave song out of my head, (and I fancied a denim pocket purse craft) – Rabbit Rabbit Rabbit – exactly what you do when you are on the telephone? Yep – Soooo, I thought, iPhone wallet?

denim pocket purses

Looking around the house, I came across some old denim jeans in the bag destined for the charity shop, and as we love to upcycle in our house, cut the back pockets off! My quest for a denim pocket purse craft was realised!
Yes? Well I liked it, and so did the kids so I’ve made these for their iPods, using little self-adhesive velcro dots as closings on the inside of the denim pockets, and we’re looking for a use for the little coin denim pocket – ideas welcome? Full instructions below…

FREE leaping rabbit printable

Instructions:

  1. Carefully cut the back pockets out of the denim jeans, so that you retain both layers of fabric, thus creating your OWN denim pocket.
  2. Find (and iron) some contrasting fabric to applique onto the denim pocket purse for the rabbit shapes. (I used some fabric I had acquired from ReUsefulUK and my neighbour RedTedArt‘s hubbies old work shirt.
  3. Print off the FREE printable rabbits template, to the scale you require for the three leaping rabbits to fit comfortably on the back pocket (the scale here is for a man’s jeans, so you may find you need to print at 90% for smaller pockets).
  4. I used Spraymount glue to lightly adhere the rabbit sheet to the BACK of the contrasting fabric, (so that when you remove the paper from the reverse of the rabbits, the rabbits will be facing the right way… your choice!)
  5. Peel the paper template from the back of the rabbits. And position on the denim pockets. I used a PVA glue to stick the rabbits onto the denim pocket purse, and gave them a light coat over the top too…
  6. Add your velcro dots to the inside of the pocket to make a secure closure.

These would make FANTASTIC little denim pocket purse bags for mini-eggs for a quick Easter gift too!

For other Spring and Easter ideas click here for our Daffodil cookies

Ali also blogs over on aGreenerLifeforus.com and is a new lover of Instagram too… pop over and say hello! And I’l adding this to Lizzie’s #MagpieMonday as I love to salvage, upcycle and re-use stuff!