cooking, cooking with kids

Tasty and quick Spinach and Mushroom Lasagne

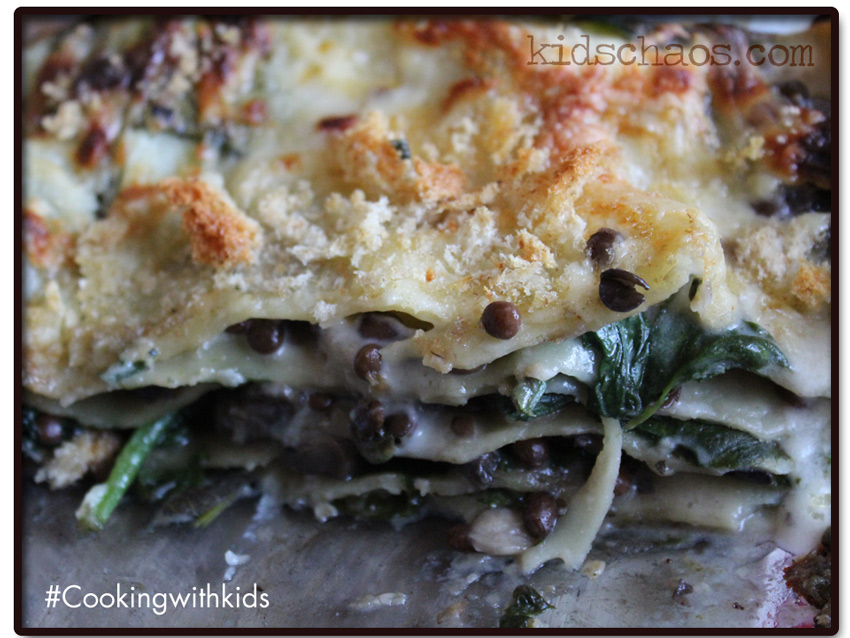
This was another quick ‘rustle’ tonight by the 9 and 11yo boys, as we had a big bag of spinach and no coriander in the house to make a spinach dahl!… The fresh pasta sheets were in the freezer, so we defrosted those and got busy with the Spinach and Mushroom Lasagne. Preheat the oven to 200 degrees.

Spinach and Mushroom LasagneIngredients for 4 people:

1 tbsp olive oil
300g bag spinach
2 garlic cloves, crushed
250g pack mushrooms, sliced
2 tsp thyme leaves, chopped
Cheese sauce (see below)
400g tin of puy lentils
1 tsp bouillon stock
300g fresh pasta sheets

For the Cheese Sauce

Big knob of butter
Flour
Milk
Water
Grated Cheese to taste

Instructions:

1) Heat the oil. Crush the garlic, and gently fry in a large frying pan for one minute in the oil.

2) Add the sliced mushrooms and the chopped thyme and stir

3) Meanwhile start the cheese sauce, by melting a bit knob of butter in another pan, and adding a tablespoon of flour, to make a roux – add milk, and keep stirring, the secret is to use a hand whisk which gets the lumps out, add water if it starts to thicken.

4) Add the spinach a handful at a time to the mushrooms and garlic in the frying pan. Sprinkle and stir in a tsp of bouillon low salt stock.

5) Add the grated cheese to the white sauce and keep stirring.

6) Add the remaining spinach and a tin of drained and rinsed puy lentils and stir.

7) Start to layer up the pie dish (we use a glass dish, as the kids like to see the layers) – starting with the spinach and lentils mix, then add two sheets of lasagne side by side to cover, and a dollop of the cheese sauce, and so on until you have used up the lasage, finish by pouring the remaining cheese sauce over the Spinach and Mushroom Lasagne dish.

8) Grate over another handful of cheese and crumble on some breadcrumbs. And place in the hot oven for 35 minutes. I find that covering the dish with tin foil after twenty minutes stops the cheesy breadcrumb crust from over cooking.

Another favourite for 11yo is his Salmon with mushrooms and pak choi, click here to read more.

Ali also blogs over on aGreenerLifeforus.com and is a new lover of Instagram too… pop over and say hello!

cooking, cooking with kids, gardening, gardening with kids

Tasty leeks with chickpeas recipe with grilled halloumi cheese

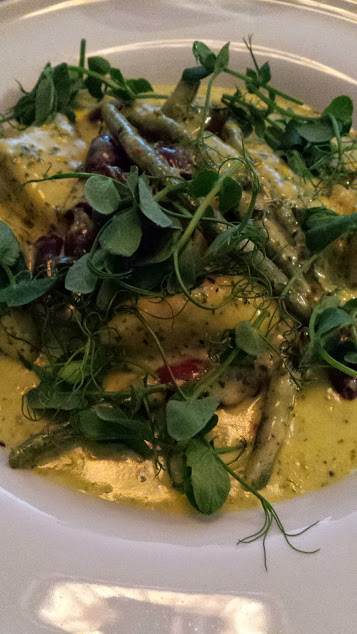
This was a quick ‘rustle’ last night, as we had a big bag of leeks, and all I could think of was Leeks in Cheese Sauce… not very original, 11yo doesn’t like cheese (unless it’s grilled halloumi!), and he wanted to make something that looked ‘restauranty’!

KidsChaos Leek Chick Pea Carrots Parsnips recipeIngredients for 4 people:

6 large leeks
500ml low salt vegetable stock
2 tins 400g tin chickpeas, drained
Packet of Halloumi cheese, sliced

For the dressing

4 tbsp extra virgin olive oil
2 tsp runny honey
Juice and zest of 2 lemons
2 garlic cloves, crushed
A pinch of salt flakes

 Instructions:

1) Chop the leeks in half, and then slice into quarters length ways, to create ribbons.

2) Break up a stock cube into a large deep frying pan, and pour in the 500ml boiling water, add the leeks and simmer for five minutes.

3) Mix up the dressing of olive oil, honey, and the juice and zest of the lemons with the crushed garlic and salt flakes

4) As the leeks soften add the chickpeas to the pan and stir through to heat them.

5) Meanwhile using a ridged frying pan, grill the halloumi (we like the grill stripes!) and start plating up the leeks and chickpeas, spoon over the dressing, and then top with the halloumi cheese – very ‘restauranty’ don’t you think?!

Serve with honey and garlic roasted carrots and parsnips – delicious!

Another favourite for 11yo is his Salmon with mushrooms and pak choi, click here to read more.

You may also like Chris Mosler’s Thinly Spread’s Rich Leek Tart. We’ll be trying that one for sure!

Ali also blogs over on aGreenerLifeforus.com and is a new lover of Instagram too… pop over and say hello!

crafts, google+ hangouts

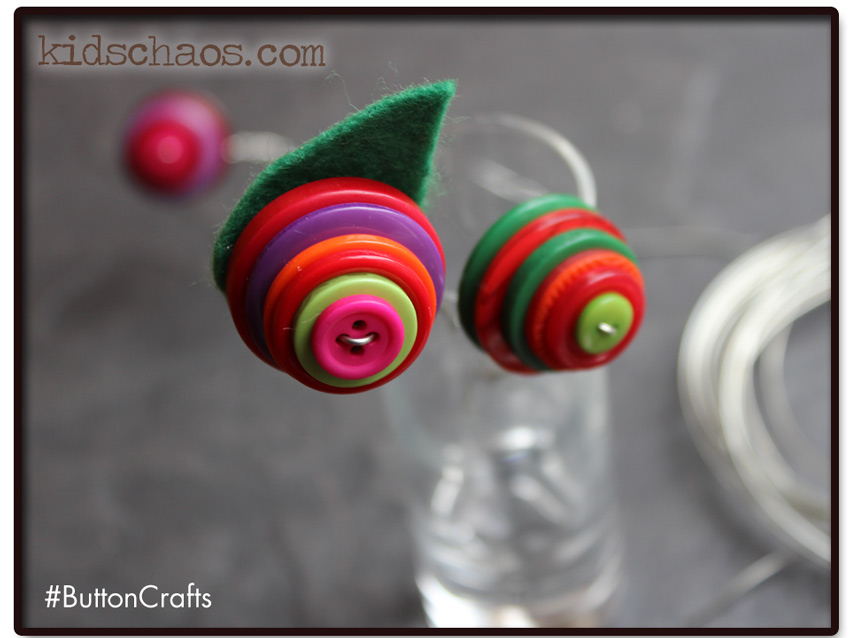
Inspired by the button cupcakes we created for swing tags for Mother’s Day, we found some thin wire and got busy with this button flower craft.button bouquet

The wire needs to be quite a narrow gauge to make it ‘bendable’ for smaller fingers – and choose buttons within a sympathetic colour spectrum to make the flowers quite beautiful!

For this button flower craft, I found that the best way to do this is to arrange the buttons in the size order you’d like, ie, larger buttons at the back and then feed them onto the wire.

IMPORTANT – make sure you thread the wire through the buttons across the diagonal if there are four holes in the button, this way the buttons sit flat on top of each other – I cut a petal shape from some off-cuts of green felt to make the petals.

Google+ hangout with redtedartIf you’d like to see more button crafts, check out our button raindrops and giant paper pom pom clouds, our  Button Cupcakes and Christmas  Rudolph Greetings Cards, and watch the Google+ hangout hosted byMaggy at RedTedArt where myself, Anthea and Maggy shared our favourite button crafts.

Ali also blogs over on aGreenerLifeforus.com and is a new lover of Instagram too… pop over and say hello!

crafts, create, google+ hangouts

Button crafts – Giant pom pom clouds

Pom pom clouds and button raindrops – we made these to hang from my son’s bedroom ceiling… coughs… they look nicer hanging against my bedroom wall though don’t you think?!

pompom clouds and buttons

The giant pom poms are really straightforward to make, easier with tissue paper if I’m honest (we used crepe paper for these giant pom poms as we’d run out of white tissue paper) however, aesthetically they look great in the textured crepe paper.

The button raindrops are really effective, choose a variety of shades of blue, and string and knot them onto some blue yarn to hang from the giant paper pom pom clouds – lovely!

giant pompoms and button rain

Google+ hangout with redtedartIf you’d like to see more button crafts, check out our Button Flowers, our Button Cupcakes and Christmas Rudolph Greetings Cards, and watch the Google+ hangout hosted byMaggy at RedTedArt where myself, Anthea and Maggy shared our favourite button crafts. (Check out Anthea’s cookies – you won’t believe them!!!)

Ali also blogs over on aGreenerLifeforus.com and is a new lover of Instagram too… pop over and say hello!

create, easter, google+ hangouts, kids

Paper plate flower crafts fascinator

We are loving Paper plate flower crafts and experimented to make a paper plate flower fascinator! Experimenting with paper plate crafts have really inspired us this week, from cookie gift boxes to Paper plate flower crafts fascinators, if you’d like to know how to make this, read on!

Paper plate flower crafts fascinator how toThis fascinator is made from just one paper plate… the flower in the centre, is made from the centre of the plate, and the two flowers with petals, are made from the two halves of the outer circle of the plate. If you would like to see more paper plate flower crafts, click the youtube image below to watch our Google+ hangout hosted by the wonderful Maggy at RedTedArt.com who made some simple paper plate nests for her pom pom chicks and the most beautiful woven paper plates too. Also present were Rebecca from herecomethegirls, with her paper plate daffodils, Emma with her mylittle3andme spiders and bird feeders, Cerys at RainyDayMum, and Anthea at ZingZingTree.

you tube google + hangoutFor full instructions on how to make a paper plate cookie gift box, click here, includes a very simple ‘how to’…

Ali also blogs over on aGreenerLifeforus.com and is a new lover of Instagram too… pop over and say hello!


baking, cooking with kids, crafts, easter

Paper plate crafts – cookie box

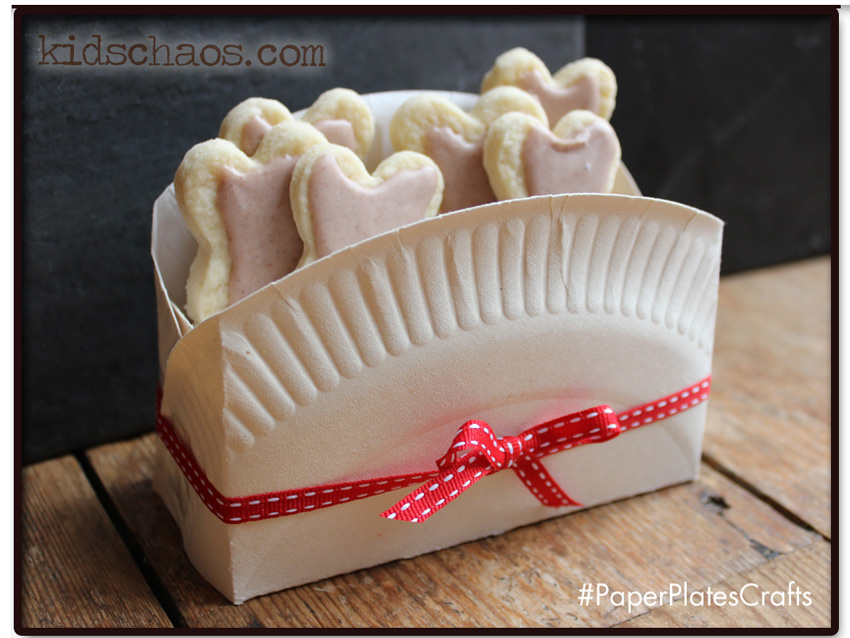
Paper Plate craft - cookie boxHow about this paper plate box? Paper plate crafts don’t have to be just ‘making faces’ or using them for wheels…

They also have very practical uses, and this paper plate box works on so many levels! We have used the paper plate to create a little cookie box, which is the perfect size for holding our Bunny Biscuits, and will make a great Easter Gift for Granny and Grandma.

I had planned to make these paper plate boxes for our next School cake bake sale, as we have a little tradition at our school – the kids get sent home with a paper plate, which has a sticker reading  “Fill me up with treats & cakes, bought or baked, whatever it takes”.

And my lovely friend Nellie (smallbumbigadventure.wordpress.com) sent me a ‘how to’ that she had found on Pinterest, so we tried it out, and photographed a ‘how to’ of our own to pop on the school facebook group page so that the kids can have a go at making them too! It has inspired 9yo and he’s been experimenting with all sorts of different ways to fold the paper plate, so that the front section is lower than the back, and it has to be said, when you ARE deciding which is going to be the front of the box, be sure to have the side flap folding towards the back for neatness…!

paper plate craft biscuit box

For full instructions on how to make the Bunny Cookies, click here, includes a fuss-free recipe for Royal Icing too…

Ali also blogs over on aGreenerLifeforus.com and is a new lover of Instagram too… pop over and say hello!

create, google+ hangouts, kids

Button Crafts – eek and I’m in my element!

Button Crafts Cupcake tagsSo with Mother’s Day looming, I thought we’d make some pretty button crafts gift tags for Grandma and Granny’s parcels as we won’t be with them on the day.

It’s a life-cycle thing too, as we have LOADS of buttons in our button box which belonged to my Grandma – we LOVE buttons in our house, and have spent hours picking through the buttons in the tin, each one having a special childhood memory for me, and now for my own children too!

Combining two of my favourite things, Button Crafts, and Cakes, I took some rather fetching paper cake cases and cut them down to fit some parcel swing tags I had lurking in the gift wrapping box. These would make great Birthday cards too – I just loved the idea of making the gift wrap special too… 🙂

Instructions:

1) Cut the cake case down to size. You should be able to get four out of one cake case.

2) Position all of the buttons where you want them onto the swing ticket.

3) Ideally take a photo for reference, we did this, so that we could remove them all, and glue them all back on in place – it’s a great way of getting the buttons exactly where you want them! Button crafts can be quite fiddly, so this is a great ‘cheat’!

4) Glue the paper case into position, I put mine over the top of the buttons, to give a more 3D effect.

Google+ hangout with redtedartIf you’d like to see more button crafts, check out our Christmas Rudolph Greetings Cards, and watch the Google+ hangout hosted by Maggy at RedTedArt where myself, Anthea and Maggy shared our favourite button crafts. (Check out Anthea’s cookies – you won’t believe them!!!)

Ali also blogs over on aGreenerLifeforus.com and is a new lover of Instagram too… pop over and say hello

baking, competitions, cooking, cooking with kids

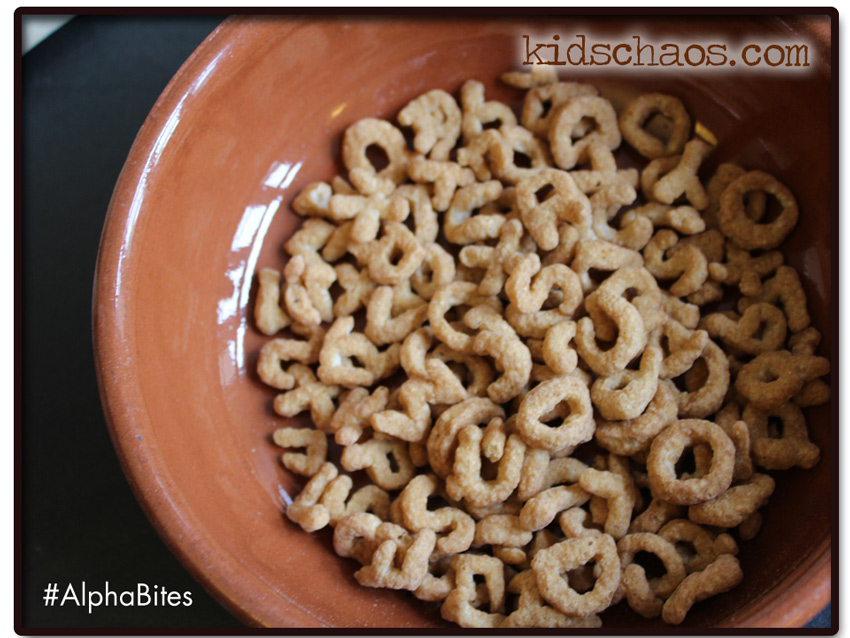
Alphabites on InstagramOur lovely friends Bear Nibbles sent us some Alphabites to try.

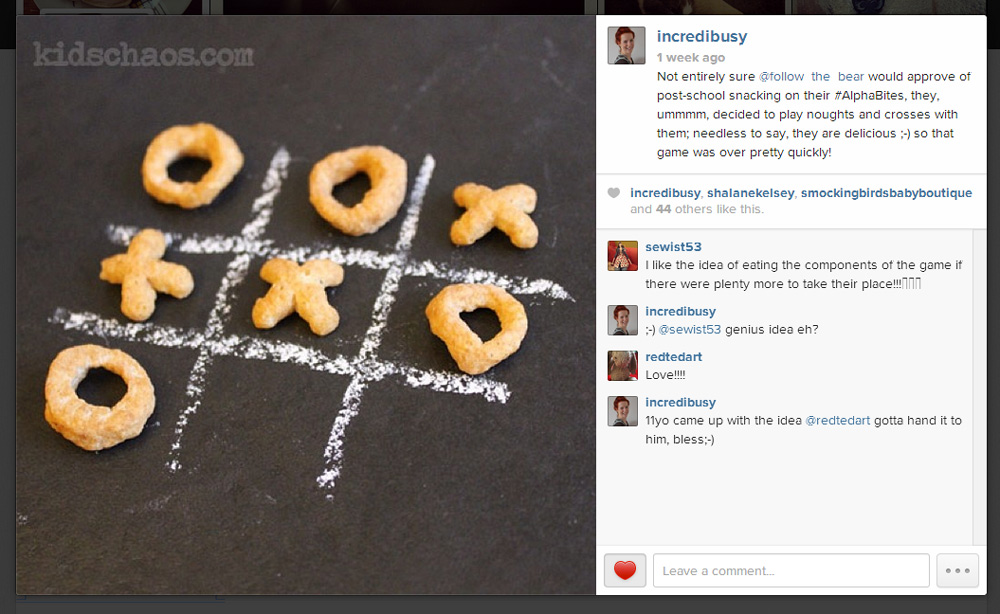
It was 4pm, so we couldn’t wait for their breakfast the next morning, as the post-school-tummy-rumbles forced us to open the box – what a GOOD plan that was, we all tucked in, and meanwhile 11yo had the great idea to grab some chalk! Our game of Noughts and Crosses made for a photogenic Instagram opportunity, (I can’t help myself…) and the boys had great fun spelling out words on the slate table mat!

There are two recipes to choose from, Multigrain and Cocoa Multigrain, we’re saving the Cocoa for the weekend as we have some good friends coming to stay at the weekend, and the boys wanted to share them with them (awwww!)

bearnibbles alphabitesWhat are Alphabites?

Crunchy cereal letters made from tasty wholegrains, with no added nonsense. They are tasty, and naturally sweetened, Alphabites do have natural coconut blossom nectar sugar in them – in fact, the lowest sugar levels of any cereal made for kids.  A bowl of Alphabites with milk has 11g of sugar and more than half of those sugars come from the milk. Milk is an important healthy ingredient for growing bones and the fact they don’t add salt to their cereal helps to that end too.

So many cereals contain salt, which, did you know, causes calcium to be lost from the bones at an age. Also, coconut blossom nectar itself contains calcium, which you do not find in refined sugar.

bearnibbles alphabitesIf your kids fancy a change from porridge (my boys’ all time favourite, and it’s a win-win as we’ve sprinkled some of the Alphabites on top of our porridge this morning!) or you’d like to try an alternative to the salty/sugary cereals currently aimed at kids, we have two packs of Bear Nibbles Alphabites to give away…

So what are you waiting for? Why not enter and see how if you’re the lucky winner!

WIN A box of each of Bear Nibbles Alphabites cereals

THIS PRIZE DRAW HAS NOW CLOSED – AND THE WINNER IS EMMA FROM STOKE ON TRENT!!

Entry into the giveaway is really easy:

Follow and tweet the following message: I would love to win #AlphabitesCereals with @Follow_the_Bear via @morekidschaos http://www.KidsChaos.com

For extra entries:

And then leave a comment letting us know you have done it. The winner will be chosen by random and contacted by email. Full Terms and Conditions are below.

Giveaway End Date: Friday 21st March 2014 11.59pm

UK Entries Only

Good luck!

Terms and Conditions:

  • The prize is a two packets of Alphabites cereal. There is no cash alternative.
  • Entrants must tweet the message and then leave a comment on the blog.
  • Entrants must follow @MoreKidsChaos on Twitter, follow @Follow_The_Bear on Twitter and follow MoreKidsChaos on Facebook.
  • All steps listed above must be followed to ensure the proper qualification into the competition
  • UK Entrants only
  • Competition closes on Friday 21st March 11.59pm
  • The winner will be chosen at random by the Kids Chaos team and contacted by email.
  • Winners must respond to the email within 7 days or forfeit the prize. Another winner will then be chosen.
  • The prize will be sent from Bear Nibbles. 
  • Kids Chaos’ decision is final
food, key stage 2, kids

British MuseumFamily friendly places to visit with kids – something I search for when we’re in London for the weekend – this weekend was no exception, so we made our way to the British Museum, to look at their amazing Egyptian collection, and the Rosetta Stone.

One of the most famous objects in the British Museum. The Rostta Stone is a broken piece of a bigger stone slab. And carved in different scripts and helped experts learn to read Egyptian hieroglyphs. Fabulous architecture both old and new and great for Key Stage Two kids! They have a brilliant online presence too, for those who are unable to visit.

forbidden planet

Our next stop was the Forbidden Planet on Shaftesbury Avenue. There is a bit of a comic book ‘thing’ going on in our house – and there really is something for everyone in this amazing store, certainly Family Friendly! and we didn’t leave empty handed – the boys were so excited and slightly overwhelmed by the stock, needless to say, Marvel comics did well out of us!

Child Friendly restaurant

pho restaurant colouring inOn the way home, we popped into Pho restaurant in Soho, 163-165 Wardour Street, and I’ll let the kids’ reviews and photos tell you more – needless to say, we were wowed from the off, with enticingly graphic colouring-in sheets, and the most delicious fresh juice combinations.

We fought over the summer rolls, and the pork balls, and squid starters, and we were amazed at how reasonably priced the Kids Menu is – with main courses from £2.70.

9yo Pho review

Kids-Chaos-PhoRestaurant-Fireplace

The Soho restaurant has a great atmosphere, and the decor is fab – we rather liked the faux fireplaces – which came into their own as the light started to fade outside – the staff were brilliant, and were really warm with the children, who enjoyed the attention, and having their own menus.

chilli at the Pho

11yo however did go for the hottest Cà-ri a Vietnamese curry packed with veggies & mushrooms, topped with nuts & served with fragrant broken rice – needless to say, he didn’t need any ADDITIONAL Chilli sauce, which he’d been previously eyeing!

The side order of Rau muống xào, stir fried morning glory (water spinach) in garlic, was delicious, and enjoyed by all four of us.

It certainly is a family friendly restaurant, so much so, the kids’ have hand written their own reviews here:

11yo review


Kids-Chaos-PhoRestaurant-Pancake-Colouring

For dessert, we were told that the Banh lá dứa pandan pancake, with roasted coconut, was fabulous, and it so WAS! Served with honey & ginger or coconut ice cream (we had both) – it was quite exquisite… And quite bonkers to have a green pancake!

phorestaurant review

The kids had sorbets whilst we enjoyed a traditional Vietnamese coffee, a Cà phê: which is entertaining in it’s own way too, served with condensed milk – and a little filter contraption – clearly very photogenic, as was the whole experience to be honest!

As 11yo quite rightly put it:

“I recommend Pho for everyone…..

All in all, Pho is a must-go!”

Ali also blogs over on aGreenerLifeforus.com and is a new lover of Instagram too… pop over and say hello!